the walking dead parents guide

The Walking Dead: A Parents’ Guide ⏤ Overview

The Walking Dead presents mature themes demanding parental guidance; understanding its graphic content, psychological impact, and moral complexities is crucial for informed viewing decisions.

Understanding the Show’s Core Themes

The Walking Dead relentlessly explores the fragility of civilization and the depths of human nature when societal structures collapse. Survival is paramount, forcing characters into agonizing moral compromises, questioning what they’re willing to sacrifice to live.

Loss and grief are pervasive, as characters constantly confront death and grapple with the emotional fallout. The series examines the importance of community and the bonds forged in the face of unimaginable adversity, yet also demonstrates how quickly those bonds can fracture under pressure.

Furthermore, it delves into themes of leadership, exploring the burdens and responsibilities of those who attempt to rebuild order, and the constant struggle between hope and despair in a world overrun by the undead.

Target Audience & Age Appropriateness

The Walking Dead is definitively not suitable for young children. Its intense violence, gore, and mature themes make it appropriate only for mature adolescents and adults – generally 17 years and older. Even for this age group, parental guidance is strongly recommended.

The show’s psychological trauma, depictions of death, and exploration of moral ambiguity can be deeply disturbing. Younger teenagers may struggle to process these complex issues without adult discussion and support.

Parents should carefully consider their child’s emotional maturity and sensitivity before allowing them to watch. It’s crucial to be prepared to discuss difficult topics and provide context for the show’s often bleak and unsettling content.

Content Concerns for Parents

The Walking Dead contains substantial graphic violence, intense psychological distress, mature themes, occasional sexual content, and frequent profanity, requiring careful parental consideration.

Graphic Violence & Gore

The Walking Dead is notorious for its explicit and frequent depictions of violence. Zombie attacks are incredibly graphic, showcasing biting, dismemberment, and extensive gore. Beyond the zombies, human-on-human violence is also prevalent, often brutal and prolonged.

These scenes aren’t simply quick cuts; they linger, displaying the aftermath in detail. The show doesn’t shy away from realistic injury representation, including blood, wounds, and the physical consequences of combat. Parents should be aware that the level of graphic detail is significantly higher than most mainstream television programs. This intense violence can be disturbing and potentially traumatizing for younger or more sensitive viewers. Careful consideration of a child’s maturity level is essential before allowing them to watch.

Intense Psychological Trauma

The Walking Dead doesn’t merely focus on physical survival; it deeply explores the psychological toll of living in a post-apocalyptic world. Characters grapple with constant loss, grief, and the moral compromises necessary for survival. Witnessing the deaths of loved ones, often in horrific ways, leads to profound trauma and PTSD-like symptoms.

The show portrays the breakdown of societal norms and the resulting emotional distress. Characters struggle with depression, anxiety, and feelings of hopelessness. Furthermore, the constant threat of death and the need to kill to survive create significant psychological burdens. Parents should be prepared to discuss these complex emotional themes with their children and provide support if needed. The show’s intensity can be emotionally draining even for adult viewers.

Mature Themes: Death, Loss, and Morality

The Walking Dead relentlessly confronts viewers with the realities of death and loss. Characters frequently face the deaths of family, friends, and allies, often in brutal and graphic ways. This constant exposure to mortality raises profound questions about the value of life and the meaning of existence.

Beyond the physical act of dying, the show explores the grieving process and the long-lasting emotional scars left by loss. It also delves into complex moral dilemmas, forcing characters to make difficult choices with no easy answers. The lines between right and wrong become blurred as survivors struggle to maintain their humanity in a world devoid of rules. Parents should anticipate discussions about these weighty themes and be prepared to offer guidance.

Sexual Content & Suggestiveness

The Walking Dead, while not overtly focused on sexual content, does contain instances of suggestive themes and implied sexual activity. These moments are often interwoven with power dynamics and the desperation of survival in a post-apocalyptic world. Relationships form amidst chaos, and intimacy can be portrayed as a means of coping with trauma or establishing control.

Parents should be aware that the show occasionally features partial nudity and discussions surrounding sexual assault, though these instances are typically handled with sensitivity. The context is often bleak and disturbing, reflecting the breakdown of societal norms. Discussions about consent, healthy relationships, and the exploitation of vulnerability may be necessary when viewing with children.

Language & Profanity

The Walking Dead features frequent and strong language, reflecting the harsh realities of its post-apocalyptic setting. Profanity, including the use of curse words and vulgar expressions, is commonplace throughout the series. Characters often resort to harsh language during moments of stress, conflict, and emotional distress. This linguistic intensity contributes to the show’s gritty and realistic tone.

Parents should be prepared for consistent use of profanity, which may be unsuitable for younger or more sensitive viewers. The language isn’t typically gratuitous, but it’s pervasive and integral to character interactions. Discussions about appropriate language use and the impact of words in heightened situations could be beneficial when watching with children.

Character Analysis & Role Models

The Walking Dead presents morally complex characters; examining their choices sparks discussions about leadership, survival, and the blurred lines of ethical behavior.

Rick Grimes: Leadership & Moral Compromises

Rick Grimes’ journey embodies the show’s central struggle: maintaining humanity amidst unimaginable horror. Initially a sheriff upholding the law, the apocalypse forces him into increasingly difficult decisions, blurring the lines between right and wrong.

Parents should note Rick’s evolution isn’t always heroic; he makes brutal choices for survival, often compromising his initial ideals. Discussing these compromises – the necessity versus the morality – offers valuable lessons about leadership under pressure.

His protective instincts towards his family are strong, but his methods are often questionable. Examining Rick’s character provides opportunities to explore the psychological toll of trauma and the weight of responsibility in a desperate world.

Daryl Dixon: Loyalty & Survival Instincts

Daryl Dixon stands out as a fan favorite, embodying resilience and unwavering loyalty. Initially presented as a rough, anti-social figure, he develops deep bonds with his group, demonstrating a fierce protectiveness towards those he cares for.

However, Daryl’s survival instincts are primal, and he’s capable of brutal acts when necessary. Parents should be aware his character showcases a more instinctual approach to morality, often prioritizing immediate safety over abstract principles.

Discussing Daryl’s character arc can highlight the importance of loyalty and found family, while also acknowledging the difficult choices individuals make when facing constant danger and loss.

Michonne: Strength & Emotional Vulnerability

Michonne is a compelling character defined by her incredible strength, both physical and emotional. Initially guarded and haunted by past trauma, she learns to open herself to connection and trust within the group. Her katana skills and fierce independence make her a formidable survivor.

However, Michonne’s backstory reveals significant emotional wounds and loss. Parents should be prepared to discuss themes of grief, trauma, and the long-lasting impact of violence as her story unfolds. Her journey demonstrates the importance of processing pain and finding healing through relationships.

Michonne’s character offers a powerful example of resilience and the capacity for growth even amidst unimaginable hardship.

Carol Peletier: Transformation & Resilience

Carol Peletier undergoes arguably the most significant transformation throughout The Walking Dead. Initially presented as a meek and abused housewife, she evolves into a resourceful and hardened survivor. This evolution, while empowering, involves morally ambiguous choices and acts of violence that parents should be prepared to discuss.

Carol’s journey highlights themes of self-discovery, empowerment, and the lengths people will go to protect themselves and those they love. Her resilience in the face of constant loss and trauma is remarkable, but her methods often challenge conventional morality.

Discussing Carol’s character provides an opportunity to explore the complexities of survival and the gray areas of right and wrong.

Navigating Difficult Conversations

Open communication is key when watching The Walking Dead; prepare to discuss challenging themes like death, morality, and violence with your children.

Discussing Death & Grief with Children

The Walking Dead relentlessly confronts mortality, making discussions about death and grief inevitable. Approach these conversations with honesty and age-appropriateness. Younger children may benefit from focusing on the idea of physical bodies ceasing to function, while older children can grapple with the emotional weight of loss.

Emphasize that grief is a natural and valid response, allowing for a range of feelings like sadness, anger, and confusion. Validate their emotions and create a safe space for them to express themselves. Connect the show’s depictions of loss to real-life experiences, if appropriate, and highlight the importance of remembering and honoring those who have passed.

Discuss how characters cope with loss, both healthily and unhealthily, providing opportunities to explore different grieving processes.

Exploring Moral Ambiguity & Difficult Choices

The Walking Dead thrives on presenting characters facing impossible dilemmas, blurring the lines between right and wrong. Use these scenarios as opportunities to discuss moral ambiguity with your children. Encourage them to consider the motivations behind characters’ actions, even when those actions are questionable or harmful.

Prompt discussions about the consequences of choices, both intended and unintended. Explore the idea that survival sometimes necessitates compromising one’s values, and the emotional toll such compromises can take.

Ask questions like: “Was that character’s decision justified, given the circumstances?” or “What would you have done in that situation?” Emphasize that there are rarely easy answers and that ethical considerations are complex.

Addressing Violence & Its Consequences

The Walking Dead depicts extreme violence, necessitating open conversations about its impact. Discuss with your children the difference between fictional violence and real-world consequences. Emphasize that violence is rarely a solution and often leads to further suffering and trauma.

Explore the emotional and psychological effects of violence on both the victims and the perpetrators. Talk about the cycle of revenge and how it can escalate conflict.

Help children understand that the show’s violence is often used to explore themes of loss, desperation, and the breakdown of societal norms. Encourage empathy for characters affected by violence, even those who commit violent acts.

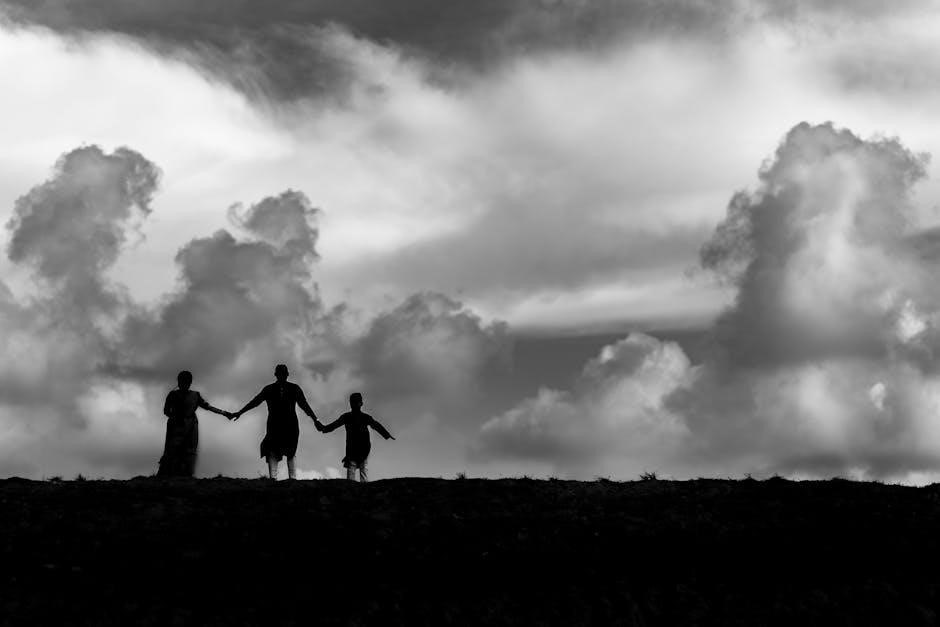
The Importance of Community & Cooperation

The Walking Dead, despite its grim setting, consistently highlights the vital role of community and cooperation for survival. Discuss with children how the characters’ ability to work together – even with disagreements – increases their chances of overcoming challenges.

Explore instances where strong communities thrive and those where internal conflicts lead to downfall. Emphasize the importance of shared resources, mutual support, and collective decision-making in times of crisis.

Talk about the different forms of leadership displayed and how effective leadership fosters cooperation. Highlight the show’s message that even in a world overrun by walkers, humanity and connection remain essential for hope and rebuilding.

Specific Season Concerns

Each season escalates in intensity; later seasons feature heightened brutality and complex moral dilemmas, requiring increased parental discretion and discussion.

Season 1-3: Establishing the Apocalypse

The initial seasons lay the groundwork for the post-apocalyptic world, introducing the core characters and the immediate struggle for survival. While violence is present, it’s generally less graphic than later seasons, focusing more on the shock and horror of the initial outbreak.

Parents should be aware of scenes depicting death and the emotional distress of characters grappling with loss. The primary concern revolves around the psychological impact of witnessing societal collapse and the desperate measures people take to survive. These early episodes establish the show’s bleak tone and introduce themes of morality and difficult choices, prompting conversations about resilience and coping mechanisms.

Though less overtly violent, the unsettling nature of the zombie threat and the constant danger can be frightening for younger or more sensitive viewers. Careful consideration of a child’s maturity level is advised before allowing them to watch these foundational seasons.

Season 4-6: Increasing Violence & Complex Relationships

These seasons mark a shift towards more frequent and graphic violence, alongside increasingly complex interpersonal dynamics. The show delves deeper into the moral gray areas of survival, showcasing brutal conflicts between communities and the consequences of desperate actions.

Parents should anticipate scenes of intense combat, torture, and disturbing imagery. The relationships between characters become more intricate, exploring themes of betrayal, manipulation, and the lengths people will go to protect their loved ones. These seasons introduce morally ambiguous characters and challenging ethical dilemmas.

Discussions about the justifications for violence and the impact of trauma are particularly relevant during this period. The emotional toll on the characters is significant, and the show doesn’t shy away from depicting the psychological scars of the apocalypse. Mature audiences only.

Season 7-9: Brutality & Psychological Impact

These seasons are arguably the most challenging for viewers due to a significant increase in graphic brutality and a relentless focus on the psychological toll of survival. The introduction of particularly ruthless antagonists leads to scenes of extreme violence and prolonged suffering, pushing the boundaries of what’s shown on screen.

Parents should be aware that these episodes contain disturbing imagery and emotionally harrowing situations. Characters grapple with profound grief, PTSD, and moral compromises that test their humanity. The show explores the darkest aspects of human nature and the devastating consequences of unchecked power.

Open conversations about the depiction of violence, its impact on the characters, and the importance of empathy are crucial. These seasons are not recommended for younger or sensitive viewers due to their intense and disturbing content.

Season 10-11: The Commonwealth & Societal Breakdown

The final seasons introduce The Commonwealth, a seemingly idyllic but deeply flawed society, offering a complex exploration of power structures and societal control. While the gore may lessen slightly, the psychological manipulation and political intrigue intensify, presenting mature themes of class disparity and corruption.

Parents should note the focus shifts towards the fragility of civilization and the dangers of unchecked authority; Characters face difficult choices with far-reaching consequences, blurring the lines between right and wrong. The show examines how easily societal norms can crumble under pressure.

Discussions about the importance of ethical leadership, the dangers of complacency, and the value of community are particularly relevant during these seasons. The narrative encourages critical thinking about societal structures and individual responsibility.

Resources for Parents

Utilize Common Sense Media for detailed reviews, explore parental control settings on streaming platforms, and find discussion guides to navigate challenging content effectively.

Common Sense Media Review

Common Sense Media offers a comprehensive review of The Walking Dead, detailing its intense violence, frightening imagery, and mature themes. They highlight the show’s suitability for older teens and adults, strongly advising caution for younger viewers.

The review meticulously breaks down content concerns, including graphic gore, disturbing scenes of death, and the psychological trauma experienced by characters. It also addresses mature themes like morality, loss, and survival, noting their complex and often unsettling portrayal.

Parents will find valuable insights into the show’s potential impact on children and teens, alongside suggestions for discussing difficult topics. The review provides a detailed age rating and emphasizes the importance of parental discretion before allowing children to watch.

Parental Control Settings for Streaming Platforms

Streaming platforms offer robust parental control settings to manage access to The Walking Dead. Most services allow profile creation with age-based restrictions, blocking content rated for mature audiences.

Utilize pin locks to prevent unauthorized viewing, and explore content filtering options to specifically block shows with graphic violence or mature themes. Regularly review and adjust these settings as children mature.

Familiarize yourself with the platform’s specific features – Netflix, AMC+, and others have varying levels of control. Consider enabling viewing history monitoring to stay informed about what your children are watching. These tools empower parents to create a safer viewing environment.

Discussion Guides & Articles

Numerous online resources provide discussion guides specifically tailored for parents navigating The Walking Dead with their children. Common Sense Media offers comprehensive reviews and talking points addressing violence, morality, and trauma.

Websites dedicated to media literacy provide articles on analyzing complex narratives and fostering critical thinking skills. These guides encourage open conversations about the show’s challenging themes, helping children process difficult content responsibly.

Seek out articles that offer age-appropriate approaches to discussing death, loss, and ethical dilemmas presented in the series. Utilizing these resources can transform viewing into a valuable learning experience, strengthening family bonds and promoting emotional intelligence.

Alternatives & Similar Shows (with varying levels of maturity)

Exploring alternatives like “Fear the Walking Dead,” “Z Nation,” or “Black Summer” offers varied zombie themes, but parental discretion regarding maturity levels remains vital.

“Fear the Walking Dead” ⏤ A Companion Series

“Fear the Walking Dead”, a spin-off, initially offered a different perspective – the outbreak’s beginning – potentially lessening some immediate gore compared to the original series. However, as the seasons progressed, it mirrored the parent show’s intensity, featuring substantial violence and complex moral dilemmas.

Parents should be aware that while starting with a potentially lower barrier to entry, “Fear the Walking Dead” quickly escalates in its depiction of brutality and psychological trauma. The show explores similar themes of survival, loss, and the breakdown of societal norms, demanding similar levels of parental guidance and discussion. It’s crucial to assess your child’s maturity level before allowing them to watch, even considering the initial seasons might seem less graphic;

Consider viewing alongside your child to facilitate conversations about the challenging content presented.

“Z Nation” ⏤ A More Campy Zombie Show

“Z Nation” distinguishes itself with a noticeably different tone – leaning heavily into camp, dark humor, and over-the-top scenarios. While still featuring zombies and post-apocalyptic survival, the gore is often presented with a stylistic, less realistic approach than “The Walking Dead.” This can make it a potentially less disturbing option for some viewers.

However, parents shouldn’t assume “campy” equates to harmless. “Z Nation” still contains violence, albeit often exaggerated, and explores mature themes like societal collapse and desperate measures for survival. The show’s humor can be dark and may not be suitable for younger or more sensitive children.

It’s essential to preview episodes and consider your child’s tolerance for even stylized violence before allowing them to watch. Discussing the show’s exaggerated nature can also be beneficial.

“Black Summer” ‒ A Gritty & Fast-Paced Zombie Series

“Black Summer” offers a starkly different zombie experience, prioritizing relentless pacing and visceral realism. Unlike the more character-driven narratives of “The Walking Dead,” “Black Summer” plunges viewers directly into the chaos of the initial outbreak, focusing on immediate survival. This intensity translates to frequent, graphic violence and a pervasive sense of dread.

The show’s gritty aesthetic and unflinching portrayal of brutality make it significantly more intense than many other zombie series. It’s crucial for parents to understand that “Black Summer” doesn’t shy away from depicting the horrors of a zombie apocalypse in a very raw and disturbing manner.

This series is generally unsuitable for younger viewers and requires careful consideration even for mature teenagers.

singer sew mate 5400 manual pdf

Singer Sew Mate 5400 Manual PDF: A Comprehensive Guide

Discover essential resources for your Singer Sew Mate 5400! This guide details finding and utilizing the official PDF manual for optimal sewing machine performance.

The Singer Sew Mate 5400 represents a reliable and versatile sewing machine‚ popular for both beginners and experienced sewists. Understanding its features and operation is key to unlocking its full potential. This is where a comprehensive manual‚ specifically the Singer Sew Mate 5400 manual PDF‚ becomes invaluable.

Since 1851‚ Singer has been synonymous with sewing innovation‚ and the Sew Mate 5400 continues this tradition. Accessing the manual in PDF format offers convenience – allowing users to easily download‚ store‚ and reference instructions on various devices. It provides detailed guidance on everything from initial setup to advanced techniques‚ ensuring a smooth and enjoyable sewing experience. Finding a trustworthy source for this PDF is crucial for accurate information.

Understanding the Importance of the Manual

The Singer Sew Mate 5400 manual PDF is far more than just a set of instructions; it’s a key to maximizing your machine’s capabilities and preventing potential issues. It details proper threading‚ bobbin winding‚ and stitch selection – essential for achieving professional results.

Without the manual‚ users risk improper setup‚ leading to skipped stitches or machine malfunction. A readily available PDF ensures quick access to troubleshooting guides‚ saving time and frustration. Singer’s legacy of quality relies on correct operation‚ and the manual provides the knowledge to maintain that standard. It empowers sewists of all levels to confidently tackle projects‚ ensuring longevity and optimal performance of their Sew Mate 5400.

Key Features of the Singer Sew Mate 5400

Explore the Sew Mate 5400’s diverse stitch options and adjustable settings‚ all thoroughly explained within the comprehensive manual for seamless project creation.

Stitch Selection and Functions

The Singer Sew Mate 5400 boasts a variety of built-in stitches‚ catering to diverse sewing needs. The manual meticulously details each stitch – from basic straight and zigzag stitches to more specialized options like buttonhole and decorative stitches. Understanding these functions is crucial for achieving professional results.

The PDF manual provides clear diagrams and step-by-step instructions on selecting the appropriate stitch for different fabrics and applications. It explains the purpose of each stitch‚ offering guidance on stitch length and width adjustments for optimal performance. Whether you’re mending clothes‚ crafting quilts‚ or embarking on complex sewing projects‚ the manual empowers you to utilize the machine’s full potential. Explore 57 stitch applications‚ including zigzags and blind hems‚ as detailed within the guide.

Adjusting Stitch Length and Width

Mastering stitch length and width adjustments is key to achieving desired sewing outcomes with the Singer Sew Mate 5400. The manual provides detailed instructions on utilizing the machine’s dials and settings to customize stitch parameters. It explains how varying stitch length impacts fabric strength and appearance‚ while width adjustments influence stitch coverage and decorative effects.

The downloadable PDF guide emphasizes the importance of testing stitch settings on scrap fabric before commencing a project. It offers guidance on selecting appropriate settings for different fabric types – from lightweight silks to heavy denim. Preset stitch length and width options simplify the process for beginners‚ while experienced sewists can fine-tune settings for precise control.

Needle and Thread Requirements

The Singer Sew Mate 5400 manual PDF clearly outlines essential needle and thread specifications for optimal performance. It details compatible needle types (universal‚ ballpoint‚ etc.) based on fabric weight and weave‚ preventing damage and ensuring smooth stitching. Thread weight recommendations are also provided‚ matching thread size to needle size for balanced tension.

The guide stresses the importance of using high-quality thread to avoid breakage and maintain stitch integrity. It explains how incorrect needle/thread combinations can lead to skipped stitches‚ puckering‚ or thread nests. Detailed charts within the PDF simplify selection‚ ensuring users choose the correct materials for various sewing projects‚ maximizing machine efficiency and longevity.

Setting Up Your Singer Sew Mate 5400

Follow the Singer Sew Mate 5400 manual PDF for detailed instructions on preparing your machine for sewing‚ ensuring proper functionality and ease of use.

Threading the Machine

Refer to your Singer Sew Mate 5400 manual PDF for a visual guide to correctly threading the upper and lower portions of the machine. Accurate threading is crucial for stitch formation and preventing issues like thread breakage or uneven stitches. The manual provides step-by-step diagrams illustrating the path the thread must follow‚ from the spool pin‚ through the tension discs‚ and finally to the needle.

Pay close attention to the numbered illustrations within the PDF‚ ensuring the thread is securely seated in each guide and tension component. Incorrect threading can lead to significant sewing problems‚ so meticulous attention to detail is essential. The manual also details how to properly thread the bobbin case‚ a vital step for completing the sewing process.

Winding the Bobbin

The Singer Sew Mate 5400 manual PDF provides detailed instructions on winding the bobbin evenly and efficiently. Begin by placing the spool of thread on the spool pin and guiding the thread through the designated thread guides. The manual illustrates how to engage the bobbin winding mechanism‚ ensuring the thread wraps smoothly and consistently around the bobbin.

Follow the diagram carefully to understand how to position the bobbin and adjust the thread tension for optimal winding. A properly wound bobbin is essential for consistent stitch quality. The PDF manual also addresses potential issues like uneven winding or thread slippage‚ offering troubleshooting tips to ensure a perfectly wound bobbin every time.

Attaching the Presser Foot

The Singer Sew Mate 5400 manual PDF clearly demonstrates how to securely attach and detach the presser foot. It illustrates the lever or screw mechanism used to raise and lower the presser foot holder. The manual emphasizes the importance of lowering the presser foot before beginning to sew‚ ensuring proper fabric feed.

Detailed diagrams show the correct alignment for various presser feet‚ including the standard foot‚ zipper foot‚ and buttonhole foot. The PDF also explains how to change presser feet for different sewing applications‚ maximizing the machine’s versatility. Proper attachment is crucial for consistent stitch formation and preventing fabric damage.

Basic Sewing Operations

Master fundamental techniques with your Singer Sew Mate 5400! The manual PDF guides you through straight stitching‚ zigzag applications‚ and effortless buttonhole creation.

Straight Stitching Techniques

Unlock precise sewing with the Singer Sew Mate 5400’s straight stitch function. The manual PDF provides detailed instructions on achieving consistent stitch length for various fabrics. Begin by properly threading the machine and selecting the desired straight stitch setting. Practice on scrap fabric to refine your guiding technique‚ ensuring even fabric feed under the presser foot.

The manual emphasizes maintaining a consistent sewing speed for uniform results. Adjust stitch length based on fabric weight – shorter for delicate materials‚ longer for heavier ones. Learn to pivot the fabric smoothly for accurate corners and curves. Troubleshooting tips within the PDF address common issues like thread bunching or skipped stitches‚ ensuring a flawless finish for all your sewing projects.

Zigzag Stitching Applications

Explore the versatility of the Singer Sew Mate 5400’s zigzag stitch‚ detailed within the manual PDF. This stitch excels beyond basic seams – it’s ideal for finishing raw edges to prevent fraying‚ creating decorative embellishments‚ and achieving stretchable seams on knit fabrics. The manual guides you through adjusting stitch width and length for diverse effects.

Discover how to utilize zigzag for appliqué‚ attaching elastic‚ and creating buttonholes (though a dedicated buttonhole foot is recommended). The PDF offers troubleshooting advice for uneven zigzag stitches or thread breakage. Mastering zigzag expands your sewing capabilities‚ allowing for creative projects and durable garment construction. Practice on scrap fabric to perfect tension and stitch settings.

Buttonhole Creation

Unlock professional-looking buttonholes with your Singer Sew Mate 5400‚ guided by the detailed instructions in the manual PDF. While the machine may not have a fully automatic buttonhole function‚ the manual demonstrates a reliable method using the zigzag stitch and a buttonhole foot (often sold separately).

Learn to accurately measure button size and adjust stitch settings for a perfect fit. The PDF provides step-by-step illustrations for creating consistent‚ reinforced buttonholes. Troubleshooting tips address common issues like uneven stitching or puckering. Practice on scrap fabric to refine your technique before applying it to your final project‚ ensuring durable and aesthetically pleasing results.

Maintenance and Troubleshooting

Ensure longevity with proper care! The Singer Sew Mate 5400 manual PDF details cleaning‚ oiling‚ and solutions for common sewing issues.

Cleaning the Machine

Regular cleaning is vital for maintaining your Singer Sew Mate 5400’s performance. The manual PDF emphasizes removing lint and dust from the bobbin area‚ feed dogs‚ and surrounding components. Always disconnect the machine from power before cleaning! Use a soft brush – often included with the machine – to gently dislodge debris. Avoid using compressed air‚ as it can push dust further inside.

The manual also details cleaning the exterior with a damp cloth. Never use abrasive cleaners or solvents‚ as these can damage the finish. Pay close attention to areas where thread fragments accumulate. Consistent cleaning‚ as outlined in the PDF‚ prevents jams and ensures smooth operation‚ extending the life of your sewing machine.

Oil Points and Lubrication

The Singer Sew Mate 5400 manual PDF details specific oiling points crucial for smooth operation. Proper lubrication minimizes friction and prevents wear and tear on internal components. Refer to the manual’s diagrams to identify these key areas‚ typically including the bobbin race‚ shuttle hook‚ and various linkages.

Use only sewing machine oil – never household oil – as it’s formulated for these delicate mechanisms. Apply oil sparingly‚ a drop at a time‚ and wipe away any excess. Over-oiling can attract dust and create a sticky residue. The manual outlines a recommended oiling schedule‚ typically after every few hours of use‚ ensuring optimal performance and longevity.

Common Problems and Solutions

The Singer Sew Mate 5400 manual PDF provides troubleshooting guidance for frequent issues. Common problems include thread bunching‚ skipped stitches‚ and needle breakage. The manual details solutions like re-threading the machine correctly‚ ensuring proper needle and thread compatibility‚ and checking the bobbin winding.

It also addresses tension adjustments and cleaning lint buildup. Refer to the manual’s diagrams for visual assistance. If the machine fails to power on‚ check the power cord and foot pedal connections. For more complex issues‚ the manual may suggest contacting a qualified sewing machine technician for repair.

Finding the Singer Sew Mate 5400 Manual PDF

Locate your Singer Sew Mate 5400 manual PDF easily through official Singer resources or trusted third-party sites for comprehensive support.

Official Singer Website Resources

Begin your search for the Singer Sew Mate 5400 manual PDF directly on the official Singer website. This is the most reliable source for authentic and up-to-date documentation; Singer provides a dedicated section for manuals‚ often categorized by machine model. Navigate to the support or downloads area of the site and utilize the search function‚ entering “Sew Mate 5400” to pinpoint the correct document.

Expect to find a downloadable PDF version of the complete user manual‚ offering detailed instructions on setup‚ operation‚ maintenance‚ and troubleshooting. The official website ensures you receive a genuine manual‚ free from potential errors or omissions found on unofficial sources. Regularly check the site for updates or revised versions of the manual.

Third-Party Manual Download Sites

While the official Singer website is preferred‚ several third-party websites archive and offer downloadable manuals‚ including the Singer Sew Mate 5400 PDF. Manualsbase.com is one example‚ hosting a collection of Singer manuals. However‚ exercise caution when using these sites. Verify the file’s legitimacy before downloading‚ as the authenticity of manuals on unofficial platforms can vary.

Always scan downloaded files with antivirus software to protect against potential malware. Compare the manual’s content with information found on the official Singer site to ensure accuracy. These sites can be useful if the official website is unavailable‚ but prioritize official sources whenever possible for the most reliable information.

Ensuring Manual Authenticity

When sourcing the Singer Sew Mate 5400 manual PDF‚ verifying its authenticity is crucial. Look for official Singer branding – logos‚ watermarks‚ and consistent design elements. Compare the manual’s content with information available on Singer’s official website or other trusted sources. Be wary of sites offering unusually low prices or requiring excessive personal information.

Check the file size; a significantly smaller file than expected could indicate a corrupted or incomplete manual. Scan downloaded files with updated antivirus software to prevent malware. Prioritize downloads from reputable websites known for providing legitimate documentation. A genuine manual will offer clear‚ accurate instructions and diagrams.

Singer Sewing Machine History & Overview

Since 1851‚ Singer has been synonymous with sewing innovation‚ beginning with Isaac Merritt Singer’s pivotal sewing machine patent and industry leadership.

Isaac Merritt Singer and the Company’s Founding

In 1851‚ Isaac Merritt Singer revolutionized sewing with his patented sewing machine design‚ officially establishing the Singer Manufacturing Company and propelling it to industry dominance. Prior to this‚ sewing was a laborious‚ time-consuming manual process. Singer’s innovation wasn’t simply about a new machine; it was about fundamentally changing how garments and textiles were produced.

His machine incorporated key improvements over earlier models‚ making it more reliable and efficient. This sparked rapid growth for the company‚ fueled by a clever marketing strategy and a network of sales and service centers. Singer’s vision extended beyond the machine itself‚ encompassing a complete system for sewing‚ including needles and accessories‚ solidifying their position as a leader.

Evolution of Singer Sewing Machine Technology

From its initial mechanical marvel‚ Singer consistently advanced sewing machine technology. Early innovations included improvements to the shuttle mechanism and the introduction of electric motors‚ dramatically increasing speed and efficiency. Throughout the 20th century‚ Singer pioneered features like zigzag stitching and automatic buttonholers‚ expanding creative possibilities for home sewers.

Later developments encompassed computerized machines with pre-programmed stitch patterns and digital displays. The introduction of heavy-duty models‚ like the Singer 4452‚ catered to demanding projects and thicker fabrics. Today‚ Singer continues to innovate with embroidery machines and sergers‚ offering a diverse range of solutions for modern sewing needs‚ building upon a legacy of over 170 years.

Singer’s Current Product Line (Heavy Duty‚ Embroidery‚ etc.)

Singer currently offers a diverse product line catering to all sewing levels. Their Heavy Duty series‚ exemplified by the 4452‚ provides robust machines for frequent use and challenging materials. Embroidery machines unlock intricate design capabilities‚ while traditional sewing machines like the M1500 offer essential stitches for everyday projects.

Overlock and Serger machines provide professional-grade finishing touches. The brand also provides accessory bundles‚ presser feet‚ and sewing kits. Singer’s website features rotating Deals on new and refurbished machines‚ making quality sewing accessible. Finding the right machine‚ and its corresponding manual‚ is simplified through their online resources.

llave de torque manual

What is a Manual Torque Wrench?

A manual torque wrench is a crucial tool for precise and safe mechanical component installation, controlling force on fasteners․ It ensures correct tightening, preventing damage and guaranteeing joint integrity․

Definition and Purpose

A manual torque wrench is specifically designed to apply a precise amount of rotational force to a fastener, like a bolt or nut․ Unlike standard wrenches, it doesn’t rely solely on the user’s strength․ Its primary purpose is to prevent over-tightening, which can damage components or strip threads, and under-tightening, which can lead to loosening and failure․

These wrenches are indispensable for achieving optimal clamping force, ensuring secure and reliable assemblies in various applications, from automotive work to bicycle maintenance and industrial machinery․ They guarantee accuracy in tightening, crucial for safety and performance․

How a Manual Torque Wrench Works

A manual torque wrench operates by utilizing an internal mechanism to measure and limit the applied force․ As force is applied to the handle, an internal spring or flexing beam resists further rotation․ When the preset torque value is reached, the wrench provides a tactile or audible signal – often a ‘click’ – indicating the desired tightness has been achieved․

This prevents exceeding the specified torque, safeguarding against damage․ The wrench’s scale allows users to precisely set the torque, ensuring consistent and accurate tightening of fasteners across various applications․

Types of Manual Torque Wrenches

Manual torque wrenches come in click, beam, and dial varieties․ Each type offers unique features for precision tightening, catering to diverse mechanical needs and budgets․

Click-Type Torque Wrenches

Click-type torque wrenches are among the most popular choices for professionals and enthusiasts alike․ They function by allowing the user to set a desired torque value, and then produce an audible “click” and a slight release of tension when that torque is reached․ This tactile and auditory feedback prevents over-tightening․

These wrenches typically feature a locking mechanism to maintain the set torque during use․ They are known for their accuracy and ease of use, making them suitable for a wide range of applications, particularly in automotive work․ Regular calibration is essential to maintain their precision․

Beam-Type Torque Wrenches

Beam-type torque wrenches represent a simpler and often more affordable option․ They consist of a long beam with a pointer that indicates the applied torque as it deflects along a calibrated scale․ The user visually monitors the pointer to achieve the desired torque level․

Unlike click-type wrenches, they don’t offer an audible or tactile signal when the target torque is reached, requiring careful observation․ While generally less precise than other types, they are durable and don’t require calibration as frequently, making them a reliable choice for basic tasks;

Dial-Type Torque Wrenches

Dial-type torque wrenches feature a dial gauge that displays the applied torque value continuously․ This provides a clear and precise reading, allowing the user to monitor the force throughout the tightening process․ They offer a visual indication of both the current torque and the target torque, enhancing accuracy․

These wrenches are known for their reliability and ease of use, though they can be more expensive than beam-type models․ Regular calibration is still recommended to maintain accuracy, ensuring consistent and dependable performance across various applications․

Key Features to Consider

When selecting a manual torque wrench, prioritize torque range, accuracy, drive size, and handle design for optimal performance and comfortable, reliable operation․

Torque Range

The torque range defines the minimum and maximum force a wrench can apply, crucial for various applications․ Selecting the correct range is paramount; a wrench too small won’t achieve necessary tightness, while one too large risks over-tightening․ Consider the specific fasteners you’ll be working with – automotive repairs often require different ranges than bicycle assembly․

Wrenches are available in diverse ranges, from low inch-pounds for delicate components to high foot-pounds for larger bolts․ Always choose a wrench where your target torque falls within the middle of its range for optimal accuracy and control․

Accuracy and Calibration

Accuracy is paramount with torque wrenches, as even slight deviations can compromise joint integrity․ Wrenches typically have a specified accuracy percentage, often ±4%․ However, accuracy degrades over time and with use, necessitating regular calibration․ Calibration verifies the wrench delivers the indicated torque value․

Professional calibration services utilize specialized equipment for precise adjustments․ Annual calibration or after 5,000 uses is recommended․ Ignoring calibration can lead to under- or over-tightening, potentially causing failures or damage․

Drive Size

Drive size refers to the square opening on the wrench head that accepts sockets․ Common sizes include 1/4 inch, 3/8 inch, and 1/2 inch, with larger sizes for heavier-duty applications․ The drive size must match the socket size to ensure a secure fit and prevent slippage during use․

Selecting the correct drive size is crucial for both functionality and safety․ Using an incorrect size can damage the wrench or socket, and compromise the torque application․

Handle Design and Grip

Handle design significantly impacts user comfort and control during torque application․ Ergonomic handles reduce fatigue, especially during repetitive tasks․ Grip material, often rubber or textured plastic, provides a secure hold, even with oily hands․

A well-designed handle allows for smooth, consistent force application, crucial for accurate torque readings․ Some wrenches feature angled handles for improved access in tight spaces, enhancing usability and efficiency․

Applications of Manual Torque Wrenches

Manual torque wrenches are vital in automotive, motorcycle, and bicycle maintenance, as well as industrial machinery, ensuring precise fastener tightening for safety and performance․

Automotive Repair

In automotive repair, a manual torque wrench is indispensable for tasks like wheel lug nuts, cylinder head bolts, and suspension components․ Precise torque application prevents over-tightening, which can strip threads or warp parts, and under-tightening, leading to loosening and potential failure․

Consulting the vehicle’s repair manual is crucial to determine the correct torque specifications for each fastener․ Using the right torque ensures optimal clamping force, maintaining joint integrity and vehicle safety․ Experienced mechanics and DIY enthusiasts alike rely on these wrenches for accurate and reliable results, contributing to long-lasting repairs․

Motorcycle Maintenance

For motorcycle maintenance, a manual torque wrench is vital for tasks like axle nuts, engine bolts, and handlebar clamps․ Motorcycles, often utilizing aluminum components, are particularly susceptible to damage from incorrect torque․ Over-tightening can easily strip threads, while under-tightening poses significant safety risks during operation․

Referencing the motorcycle’s service manual is essential for accurate torque specifications․ Proper torque ensures optimal component clamping, enhancing performance and rider safety․ A torque wrench is a fundamental tool for any motorcycle owner performing routine maintenance or repairs, guaranteeing reliability and preventing costly damage․

Bicycle Assembly and Repair

In bicycle assembly and repair, a manual torque wrench is increasingly essential, especially with carbon fiber components․ Modern bicycles often specify precise torque values for stems, seatposts, and brake calipers to prevent damage․ Carbon fiber, in particular, is vulnerable to cracking if over-tightened, compromising structural integrity and rider safety․

Using a torque wrench ensures proper clamping force without exceeding material limits․ Even for aluminum parts, accurate torque prevents thread damage and ensures a secure connection․ A torque wrench is a worthwhile investment for any cyclist performing their own maintenance or building a custom bike․

Industrial Machinery

Within industrial settings, manual torque wrenches are vital for maintaining machinery and equipment․ Precise tightening of bolts and fasteners is critical for ensuring operational safety and preventing costly downtime․ Applications range from assembling heavy machinery to maintaining conveyor systems and robotic arms․

Consistent torque application prevents loosening due to vibration and thermal expansion․ Using a calibrated torque wrench guarantees adherence to manufacturer specifications, extending the lifespan of components and reducing the risk of catastrophic failures․ Regular calibration and careful use are paramount in these demanding environments․

Using a Manual Torque Wrench Correctly

Proper technique involves setting the correct torque, applying force smoothly, and recognizing the click (for click-type wrenches) to avoid over or under-tightening fasteners․

Setting the Torque Value

Precisely setting the torque value is paramount for accurate fastening․ Locate the adjustment mechanism on the wrench – typically a rotating handle or locking ring․ Consult the manufacturer’s specifications or repair manual to determine the required torque, expressed in Newton-Meters (Nm), foot-pounds (ft-lbs), or inch-pounds (in-lbs)․

Carefully adjust the wrench until the desired value aligns with the indicator scale․ Double-check the setting before applying force, ensuring it’s locked securely to prevent accidental changes during use․ Accurate initial setup is fundamental to achieving the correct tightness and preventing damage․

Applying Force Smoothly

When applying force with a manual torque wrench, prioritize a slow, steady pull․ Avoid jerking or rapid movements, as these can lead to inaccurate torque application and potential damage to the fastener or connected components․ Maintain a consistent rate of force throughout the tightening process․

Use a controlled motion, keeping the wrench aligned with the fastener․ Apply force perpendicular to the wrench handle for optimal accuracy․ Remember, smooth and deliberate action is key to achieving the specified torque value reliably and safely․

Recognizing the Click (Click-Type)

With click-type torque wrenches, a distinct “click” sound and a slight release of tension signify that the preset torque value has been reached․ This audible and tactile feedback is crucial for preventing over-tightening․ Do not continue applying force after the click; stop immediately․

The click is a precise indicator, but ensure you’re fully focused to hear and feel it․ A muffled or indistinct click may suggest the wrench needs recalibration․ Always double-check the setting after each use․

Maintenance and Care

Proper maintenance involves cleaning after use, storing at minimum torque, annual or 5,000-use calibration, and avoiding impacts to maintain accuracy and longevity․

Cleaning After Use

Regular cleaning is vital for maintaining the accuracy and lifespan of your manual torque wrench․ After each use, wipe down the wrench with a clean, dry cloth to remove any dirt, grease, or debris․ Avoid using harsh solvents or abrasive cleaners, as these can damage the wrench’s finish and internal components․ Pay particular attention to the drive square and handle, ensuring they are free from contaminants․ A quick wipe-down prevents corrosion and ensures smooth operation, contributing to reliable performance over time․ Proper cleaning is a simple yet effective maintenance step․

Storing with Minimum Torque

Always store your manual torque wrench with the torque setting dialed down to its lowest value․ This releases tension on the internal spring, preventing it from losing its calibration over time․ Storing at maximum torque can permanently deform the spring, leading to inaccurate readings․ Keep the wrench in its protective case, if available, to shield it from dust and physical damage․ Proper storage ensures the wrench remains accurate and reliable, ready for precise tightening when needed, extending its useful life significantly․

Calibration Frequency (Annual or 5,000 Uses)

To maintain accuracy, calibrate your manual torque wrench at least annually, or after every 5,000 uses – whichever comes first․ Frequent use and spring fatigue can affect precision․ Calibration verifies the wrench delivers the specified torque․ Professional calibration services utilize specialized equipment for precise adjustments․ If professional calibration isn’t feasible, explore self-checking methods, though they offer less accuracy․ Regular calibration ensures reliable performance, preventing over or under-tightening, and safeguarding critical mechanical assemblies․

Avoiding Impacts and Drops

Protecting your manual torque wrench from impacts and drops is paramount for maintaining its accuracy․ Internal mechanisms are delicate and easily disrupted by physical shock․ Even seemingly minor drops can misalign components, leading to inaccurate torque readings․ Handle the wrench with care, avoiding forceful placement on hard surfaces․ Proper storage, away from potential falling objects, is also crucial․ Damage from impacts compromises the wrench’s reliability, potentially causing fastener failures and jeopardizing safety․

Understanding Torque Units

Torque is measured in Newton-Meters (Nm), Foot-Pounds (ft-lbs), and Inch-Pounds (in-lbs)․ Knowing these units is vital for accurate application and proper fastener tightening․

Newton-Meters (Nm)

Newton-Meters (Nm) represent the metric unit for torque, signifying the force required to rotate an object a specific distance․ It’s calculated by multiplying the force applied (in Newtons) by the length of the wrench arm (in meters)․ This unit is widely used in automotive and industrial applications across Europe and increasingly globally․ When using a torque wrench set to Nm, ensure accurate conversion if specifications are provided in other units․ Proper understanding of Nm is crucial for achieving precise tightening and preventing damage to components, ensuring optimal performance and safety․

Foot-Pounds (ft-lbs)

Foot-Pounds (ft-lbs) is the imperial unit commonly used to measure torque, particularly in the United States․ It represents the force needed to rotate an object using a one-foot-long lever with one pound of force applied․ Many automotive repair manuals and specifications utilize ft-lbs․ When working with torque wrenches, accurate conversion between ft-lbs and other units like Newton-Meters is essential․ Understanding this unit ensures correct fastener tightening, preventing over or under-tightening, and maintaining the integrity of mechanical assemblies for reliable performance and safety․

Inch-Pounds (in-lbs)

Inch-Pounds (in-lbs) is a smaller unit of torque measurement, frequently employed for applications requiring precise, lower torque values․ It signifies the force needed to rotate an object with a one-inch lever applying one pound of force․ This unit is particularly relevant in bicycle assembly, delicate machinery, and smaller fasteners․ Accurate conversion from ft-lbs to in-lbs is crucial for precise tightening․ Utilizing in-lbs prevents damage to components and ensures optimal performance, maintaining the integrity of sensitive mechanical systems and preventing stripping of threads․

Importance of Proper Torque

Correct torque prevents over or under-tightening, safeguarding joint integrity and component lifespan․ Precise torque application ensures reliable performance and avoids potential mechanical failures․

Preventing Over-Tightening

Over-tightening fasteners can lead to significant problems, including stripping threads, damaging components, and even causing complete failure of the assembly․ A manual torque wrench precisely controls applied force, eliminating guesswork․ Applying excessive force stretches bolts beyond their yield strength, weakening them and potentially leading to breakage under stress․ This is particularly critical in automotive and industrial applications where safety is paramount․ Using the correct torque specification, achieved with a calibrated wrench, ensures components aren’t stressed beyond their limits, maintaining structural integrity and preventing costly repairs or dangerous situations․

Preventing Under-Tightening

Under-tightening fasteners is equally problematic, creating loose connections prone to vibration and eventual failure․ Insufficient torque allows movement, leading to thread loosening and potential component separation․ This can result in leaks, misalignment, and reduced performance․ A manual torque wrench guarantees the correct clamping force, preventing these issues․ Proper torque ensures a secure joint, resisting external forces and maintaining the integrity of the assembly․ Ignoring specified torque values risks compromising safety and reliability, especially in critical applications like vehicle maintenance and machinery operation․

Ensuring Joint Integrity

A manual torque wrench is paramount for achieving optimal joint integrity․ Correctly tightened fasteners distribute stress evenly, maximizing the connection’s strength and lifespan․ This prevents premature wear, deformation, and potential failure points․ Precise torque application creates a reliable seal, crucial in fluid-containing systems, preventing leaks and maintaining pressure․ Utilizing a torque wrench demonstrates a commitment to quality and safety, ensuring components function as intended․ Ultimately, it guarantees a robust and durable assembly, minimizing the risk of costly repairs or hazardous situations․

Calibration and Accuracy

Regular calibration is vital for maintaining a torque wrench’s accuracy․ Professional services or self-checks verify proper function, ensuring reliable torque application and preventing errors․

Why Calibration is Necessary

Calibration is essential because torque wrenches can lose accuracy over time due to wear and tear, impacts, or improper storage․ Consistent and precise torque application is critical for safety and component longevity․ Without regular calibration, there’s a risk of over-tightening, leading to stripped threads or broken fasteners, or under-tightening, potentially causing joint failure․ Annual calibration, or after approximately 5,000 uses, guarantees the wrench delivers the specified torque value, maintaining the integrity of assembled parts and preventing costly repairs or accidents․ Maintaining accuracy builds confidence in your work․

Professional Calibration Services

Professional calibration services utilize specialized equipment to verify and adjust a torque wrench’s accuracy against traceable standards․ These services provide a detailed calibration certificate documenting the ‘as-found’ and ‘as-left’ readings, ensuring compliance and peace of mind․ Technicians meticulously inspect the wrench, identifying any wear or damage․ Choosing a reputable calibration lab is crucial; look for ISO 17025 accreditation․ This guarantees competence and reliable results․ Regular professional calibration is a worthwhile investment, safeguarding your tools and the quality of your work․

Self-Checking Methods

Self-checking methods offer a basic field verification of torque wrench functionality, though they aren’t substitutes for professional calibration․ A simple test involves applying torque to a known fastener and observing the wrench’s behavior․ Consistent clicks at the set value suggest reasonable accuracy․ However, these methods lack the precision of calibrated equipment․ Regularly inspecting for physical damage, like a loose handle or damaged scale, is also vital․ Remember, these checks are preliminary; professional calibration remains essential for guaranteed accuracy and reliable performance․

Troubleshooting Common Issues

Common issues include a wrench failing to click, inaccurate readings, or handle slippage․ These often stem from improper use, damage, or lack of calibration․

Wrench Not Clicking

If your click-type torque wrench isn’t clicking, several factors could be at play․ First, verify the torque setting is correctly adjusted to a value within the wrench’s range․ A setting too low won’t engage the mechanism․ Ensure you’re applying slow, steady pressure; rapid force can cause it to be missed․

Also, internal mechanisms can become stiff with disuse or lack of lubrication․ Finally, a damaged or worn internal component prevents proper engagement․ If cleaning and re-lubrication don’t resolve the issue, professional repair or replacement may be necessary․

Inaccurate Readings

Inaccurate torque wrench readings compromise fastener integrity and can lead to failures․ Calibration drift is a primary cause, necessitating regular checks – annually or after 5,000 uses․ Damage from impacts or drops significantly affects accuracy, potentially warping internal components․

Ensure the wrench is stored with the torque set to its minimum value to relieve spring tension․ Using an incorrect socket or adapter can also introduce errors․ If suspected, professional calibration is crucial to restore reliable performance․

Handle Slippage

Handle slippage during torque application poses a safety risk and introduces inaccuracy․ A worn or damaged handle grip reduces friction, increasing the chance of losing control․ Ensure your hands are clean and dry before use, and avoid applying lubricants to the handle․

Inspect the handle regularly for cracks or damage, replacing it if necessary․ Applying smooth, consistent force minimizes the likelihood of slippage․ Always use the correct socket size to prevent handle movement during operation․

Safety Precautions

Always wear safety glasses to protect your eyes․ Use the correct socket and avoid excessive force to prevent damage or injury during operation․

Wearing Safety Glasses

Protecting your eyes is paramount when using a manual torque wrench․ Fasteners, especially under high torque, can unexpectedly break or slip, sending fragments flying․ These projectiles pose a significant risk of eye injury․ Safety glasses act as a crucial barrier, shielding your eyes from these hazards․

Even if you’ve used a torque wrench many times before, the potential for unforeseen issues remains․ Don’t underestimate the force involved; a seemingly secure fastener can still fail․ Prioritize eye protection – it’s a simple step that can prevent a serious, potentially vision-threatening injury․ Always ensure your safety glasses fit snugly and are in good condition․

Using the Correct Socket

Employing the appropriate socket is vital for accurate torque application and preventing damage to both the wrench and the fastener․ A poorly fitting socket can slip, rounding off the fastener’s head and compromising the torque reading․ Ensure the socket’s drive size precisely matches the wrench’s drive size – typically ¼”, ⅜”, or ½”․

Furthermore, select a socket specifically designed for the fastener type (e․g․, six-point for bolts, twelve-point for nuts)․ Avoid using worn or damaged sockets, as they can lead to inaccurate torque and potential failure․ A secure fit guarantees efficient force transfer and reliable results․

Avoiding Excessive Force

Applying excessive force beyond the wrench’s capacity can damage the tool and, more critically, the fastened components․ Once the wrench reaches the set torque value – indicated by a click or dial reading – immediately stop applying force․ Continuing to pull or push can lead to stripped threads, broken bolts, or distorted parts․

Remember, a torque wrench isn’t designed for loosening fasteners; use a breaker bar for that purpose․ Gentle, controlled pressure is key to achieving accurate torque․ Over-tightening compromises joint integrity and can create safety hazards․

keurig 2.0 user manual

Keurig 2.0 User Manual: A Comprehensive Guide

Welcome! This comprehensive guide details the Keurig 2.0 brewing system‚ offering step-by-step instructions for optimal coffee experiences. Explore features and troubleshooting!

This manual celebrates your new Keurig 2.0 and provides a roadmap to its successful operation. Familiarize yourself with the packaging before discarding it.

Congratulations on your purchase! This manual is specifically designed to help you get started with your product and provide you with a smooth brewing process.

Welcome to the world of Keurig 2.0! This brewer represents a significant advancement in single-cup brewing technology‚ offering convenience and customization. The Keurig 2.0 is designed for ease of use‚ delivering a perfect cup of coffee‚ tea‚ or hot cocoa with minimal effort.

This guide will walk you through every aspect of your new brewer‚ from initial setup and operation to cleaning and maintenance. It’s designed for both first-time Keurig users and those familiar with previous models. Prepare to enjoy a consistently delicious beverage experience!

Congratulations on your purchase and happy brewing!

Unboxing and Initial Setup

Let’s get started! Begin by carefully removing your Keurig 2.0 brewer from its packaging. Ensure all packing tape is removed from the brewer itself. Inspect the unit for any visible damage that may have occurred during shipping.

Before first use‚ place the brewer on a stable‚ level surface near a grounded electrical outlet. This initial setup is crucial for safe and efficient operation. Refer to the included safety guidelines before plugging in the device.

Plug the brewer into the outlet and prepare for the next steps!

Removing Packaging and Protective Materials

Carefully unpack your new Keurig 2.0 brewer. Begin by removing all external packaging‚ including the cardboard box and any plastic wrapping. Pay close attention to removing all packing tape from the brewer itself – this is a critical first step.

Inspect the unit for any protective foam or inserts used during shipping. Remove these materials to ensure they don’t interfere with the brewer’s operation. Retain the packaging for potential future transport or warranty claims.

Plugging In and Powering On

Ensure the Keurig 2.0 is placed on a stable‚ level surface. Locate the power cord and plug it into a grounded electrical outlet; Verify the outlet provides the correct voltage. Once connected‚ the brewer is ready for initial power-up.

Press the power button to turn on the Keurig 2.0. The unit will initiate a brief self-check. Allow the brewer to fully power on before proceeding with setup. Do not operate if any damage is visible.

Understanding the Keurig 2.0 Control Panel

The Keurig 2.0 control panel features intuitive buttons for effortless operation. The prominent “Brew” button initiates the brewing cycle. Utilize the brew size selection to choose your desired cup volume. The power button controls the unit’s on/off state.

Explore settings for customized brewing. The control panel allows for adjustments to brew strength and temperature. Familiarize yourself with the indicator lights to monitor the brewing process and system status.

Brew Button Functionality

The Brew button is central to operating your Keurig 2.0. Pressing this button initiates the brewing cycle after K-Cup placement and size selection. A single press starts brewing; a subsequent press may pause or cancel the process.

The button illuminates during brewing‚ providing visual feedback. Ensure a mug is properly positioned before pressing. The “Brew” button works in conjunction with the brew size settings for customized cup volumes.

Brew Size Selection

Selecting the brew size is simple on the Keurig 2.0. Choose from multiple options to match your mug and desired coffee strength. The default size is often 8oz‚ but you can customize it.

Use the designated buttons to cycle through available sizes – typically 6‚ 8‚ 10‚ and 12oz. Larger sizes yield weaker coffee‚ while smaller sizes create a bolder brew. Ensure the selected size aligns with your mug’s capacity.

Water Reservoir Management

Maintaining the water reservoir is crucial for optimal Keurig 2.0 performance. Regularly filling with fresh‚ filtered water ensures the best-tasting coffee and prolongs brewer life. Remove the reservoir for easy filling‚ and always ensure it’s securely placed before brewing.

Consider installing a Keurig water filter to remove chlorine and impurities. Replace the filter every two months‚ or after 60 tanks‚ for consistently clean water and enhanced flavor.

Filling the Water Reservoir

To fill the reservoir‚ gently remove it from the back of the Keurig 2.0 brewer. Locate the maximum fill line and add fresh‚ filtered water accordingly. Avoid overfilling to prevent spills during operation. Once filled‚ securely reattach the reservoir‚ ensuring it clicks into place.

Always use potable water; distilled or previously boiled water isn’t recommended. Regularly cleaning the reservoir with mild soap and water maintains hygiene and optimal taste.

Water Filter Installation and Replacement

To install a filter‚ soak it in cold water for five minutes. Then‚ insert the filter into the designated holder within the water reservoir. Ensure a snug fit for optimal filtration. Replacement is crucial!

Replace the filter every two months‚ or after 60 tanks of water. This maintains water quality and prevents mineral buildup. Discard used filters responsibly and consider purchasing Keurig’s filter replacement packs.

K-Cup Pod Compatibility

Keurig 2.0 brewers are designed for compatibility with a wide range of K-Cup pod varieties‚ offering diverse beverage choices. However‚ the Plus Series/2.0 models require specifically labeled K-Cup pods for full functionality.

Alternatively‚ utilize the My K-Cup Reusable Filter for ground coffee‚ expanding your brewing options. This allows for personalized coffee blends and reduces waste. Ensure proper pod or filter placement for a seamless brewing experience.

Keurig 2.0 and K-Cup Pod Varieties

Keurig 2.0 brewers demonstrate compatibility with numerous K-Cup pod varieties‚ encompassing coffee‚ tea‚ hot chocolate‚ and more. However‚ the Plus Series and 2.0 models necessitate K-Cup pods explicitly marked as compatible for optimal performance.

Older‚ non-labeled pods may function‚ but brewing may be incomplete. Always check the packaging to ensure pod suitability. Explore the extensive range of licensed brands and flavors available for your Keurig 2.0 system!

Using My K-Cup Reusable Filter

My K-Cup reusable filters allow you to enjoy your favorite ground coffee with your Keurig 2.0 brewer. Simply fill the filter with your desired amount of ground coffee‚ close the lid securely‚ and place it into the K-Cup pod holder.

Ensure the filter is properly seated before brewing. This offers a cost-effective and environmentally friendly alternative to single-use K-Cup pods‚ providing brewing flexibility!

Brewing Your First Cup of Coffee

Begin by placing a mug‚ at least 12oz in size‚ on the drip tray plate to accommodate splashing. Ensure the water reservoir is filled and a K-Cup pod is inserted correctly. Press the brew button to initiate the brewing process.

The Keurig 2.0 will automatically brew your selected cup size. Enjoy your freshly brewed coffee! Remember to remove the used K-Cup pod after brewing is complete.

Placing a Mug on the Drip Tray

Before brewing‚ carefully position a mug onto the drip tray plate. It’s crucial to use a mug with a minimum capacity of 12 ounces to prevent spills and ensure proper brewing.

Ensure the mug is stable and centered on the plate. This prevents accidental tipping during the brewing cycle. The drip tray is designed to catch any potential drips or splashes‚ keeping your countertop clean.

Initiating the Brewing Process

To begin brewing‚ press the “Brew” button on the Keurig 2.0 control panel. The brewer will automatically begin heating the water and dispensing it through the K-Cup pod.

Observe as your chosen beverage fills your mug. The brewing time varies depending on the selected brew size. Once complete‚ the brewer will automatically stop‚ delivering a perfectly brewed cup. Enjoy!

Cleaning and Maintenance

Regular cleaning ensures optimal performance and longevity of your Keurig 2.0. Descale the brewer every three to six months‚ depending on water hardness‚ to remove mineral buildup.

Clean the exterior with a damp cloth and the drip tray after each use. Remove and wash the drip tray and K-Cup pod holder regularly. Consistent maintenance guarantees fresh‚ flavorful brews for years to come!

Descaling the Keurig 2.0 Brewer

Descaling removes mineral buildup‚ crucial for maintaining peak performance. Empty the water reservoir and add the Keurig Descaling Solution‚ following package directions. Run a full brew cycle without a K-Cup‚ repeating until the reservoir is empty.

Rinse by brewing several cycles with fresh water. This process ensures a clean brewer and consistently delicious coffee. Regular descaling extends the life of your Keurig 2.0!

Cleaning the Exterior and Drip Tray

Regular cleaning maintains hygiene and appearance. Unplug the brewer and wipe the exterior with a damp cloth – avoid abrasive cleaners. Remove the drip tray and wash it with warm‚ soapy water; ensure it’s thoroughly rinsed before replacing.

Periodically check and clean the K-Cup pod holder. A clean exterior and drip tray contribute to a pleasant brewing experience and prolong the life of your Keurig 2.0.

Troubleshooting Common Issues

If the brewer won’t power on‚ verify the power cord is securely plugged into a grounded outlet. For weak or strong coffee‚ adjust brew size or try a different K-Cup pod.

Decoding error messages is crucial; refer to the “Understanding Error Messages” section. If issues persist‚ consult Keurig customer support for assistance. Regular maintenance prevents many problems!

Brewer Not Powering On

If your Keurig 2.0 fails to power on‚ first ensure the power cord is firmly connected to both the brewer and a functioning grounded electrical outlet. Verify the outlet is receiving power by testing it with another device.

Remove packing tape from the brewer. If the problem continues‚ check the brewer’s internal fuse (if applicable) or contact Keurig customer support for further assistance and potential repair options.

Coffee Brewing Too Weak or Too Strong

Weak coffee? Try using a darker roast K-Cup pod or selecting a smaller brew size. Ensure the water reservoir is adequately filled. Too strong? Opt for a lighter roast pod or increase the brew size.

Experiment with different K-Cup varieties to find your preferred strength. Consider descaling the brewer regularly‚ as mineral buildup can affect brew quality and flavor extraction;

Advanced Features and Settings

Explore programmable features! Customize your Keurig 2.0 experience with auto-on/off settings for convenient brewing. Adjust brew temperature to suit your preference‚ enhancing flavor profiles of various coffee types.

These settings allow for personalized brewing‚ ensuring each cup meets your exact taste. Discover optimal settings through experimentation‚ tailoring the brewer to your favorite K-Cup pods and desired strength.

Programmable Features

Unlock convenience with auto-on/off! Schedule your Keurig 2.0 to automatically power on‚ ensuring a fresh brew awaits you. Utilize the auto-off function for energy saving and peace of mind when not in use;

These programmable settings streamline your daily routine‚ providing a customized brewing experience. Explore the menu options to tailor the brewer to your lifestyle‚ enjoying effortless coffee preparation.

Adjusting Brew Temperature

Customize your coffee’s warmth! The Keurig 2.0 allows you to fine-tune the brewing temperature‚ catering to different coffee types and personal preferences. Experiment with hotter settings for bolder flavors or cooler temperatures for delicate blends.

Access the temperature control through the brewer’s settings menu. Achieving the ideal temperature unlocks the full aromatic potential of your K-Cup pods‚ enhancing your overall coffee enjoyment.

Understanding Error Messages

Decoding alerts is key! Your Keurig 2.0 brewer utilizes error messages to communicate issues‚ ensuring optimal performance. Common codes indicate problems like low water‚ a clogged needle‚ or a K-Cup pod issue.

Consult the brewer’s display and this manual to decipher each code. Resolving these messages promptly prevents damage and maintains consistent brewing. Don’t ignore the signals – address them for continued enjoyment!

Decoding Common Error Codes

Let’s break down those alerts! A “Low Water” message signals refilling the reservoir. “K-Cup Pod Error” suggests improper insertion or an incompatible pod. A “Clogged Needle” requires cleaning the exit needle with a paperclip.

Other codes may indicate internal issues. Refer to the full error code list within this manual for specific troubleshooting steps. Addressing these promptly ensures optimal brewing and prevents potential damage to your Keurig 2.0.

Resolving Error Messages

Don’t panic! For “Low Water‚” simply refill the reservoir and restart the brew cycle. If you encounter a “K-Cup Pod Error‚” remove and reinsert the pod‚ ensuring proper alignment. A “Clogged Needle” requires gentle cleaning with a paperclip – power off first!

If issues persist‚ consult the complete troubleshooting section or Keurig’s customer support. Addressing errors quickly maintains your brewer’s performance and extends its lifespan.

Safety Precautions

Prioritize safety! Always unplug the Keurig before cleaning. Avoid touching hot surfaces during and immediately after brewing. Keep the power cord away from water sources to prevent electrical hazards.

Handle hot liquids with extreme care to avoid burns. Supervise children when the brewer is in operation. Never immerse the appliance in water. Follow these guidelines for safe and enjoyable brewing!

Electrical Safety Guidelines

Crucially‚ ensure the Keurig is plugged into a grounded outlet. Never operate with a damaged cord or plug. Avoid using extension cords; plug directly into the wall. Do not attempt to repair the appliance yourself – contact Keurig support.

Keep the brewer away from water sources to prevent shock. Unplug during cleaning and when not in use. Electrical safety is paramount for reliable operation and user protection.

Hot Liquid Handling

Caution! Brewed coffee is extremely hot. Exercise care when handling the Keurig 2.0 and freshly brewed beverages to avoid burns. Always allow the coffee to cool slightly before consuming.

Keep children and pets away during operation. Avoid touching hot surfaces‚ like the brew head. If spills occur‚ clean them immediately to prevent accidents. Prioritize safety when enjoying your Keurig!

Warranty Information

Keurig 2.0 Warranty Coverage: Keurig Green Mountain‚ Inc. provides a warranty against defects in materials and workmanship. Coverage typically lasts for one year from the original purchase date.

This warranty doesn’t cover damage from misuse or improper maintenance. To initiate a claim‚ retain your proof of purchase and contact Keurig Customer Support. See full details online or in the included documentation.

Keurig 2.0 Warranty Coverage

Coverage Details: The Keurig 2.0 brewer is warranted against manufacturing defects for one year from the original purchase date. This includes issues with functionality under normal household use. Damage resulting from accidents‚ misuse‚ or unauthorized repairs isn’t covered.

Retain your purchase receipt as proof of date. Keurig may‚ at its discretion‚ repair or replace the defective unit. This warranty gives you specific legal rights.

Contacting Keurig Customer Support

Need Assistance? For questions or support regarding your Keurig 2.0 brewer‚ contact Keurig Green Mountain‚ Inc. directly. You can reach them via phone at 1.866.901.BREW (2739).

Alternatively‚ visit the official Keurig website for online help resources‚ FAQs‚ and troubleshooting guides. Their website provides extensive support options to resolve common issues quickly and efficiently. Keurig aims for customer satisfaction!

Downloading the Keurig 2.0 Manual (PDF)

Access the Full Manual! A comprehensive PDF version of the Keurig 2.0 user manual is readily available for download. This digital copy provides detailed instructions‚ diagrams‚ and troubleshooting tips for your convenience.

Find the downloadable PDF through various online sources‚ including ManualsLib and the Keurig website. Having the PDF allows offline access to all the information you need for optimal brewer operation and maintenance.

Frequently Asked Questions (FAQ)

Common Queries Addressed! Do Keurig Plus Series/2.0 brewers require special pods? The answer is no – they are compatible with a wide variety of K-Cup pods. Need help brewing? Explore how-to videos and instructions online.

Find answers to frequently asked questions regarding operation‚ maintenance‚ and troubleshooting. Keurig’s support resources and user forums offer solutions to common issues‚ ensuring a seamless brewing experience.

Resources and Support

Need Assistance? For comprehensive support‚ visit the official Keurig website for online help‚ user manuals (including downloadable PDFs)‚ and troubleshooting guides. Explore user forums and communities to connect with fellow Keurig owners.

Keurig’s customer support team is readily available to address your concerns. Access valuable resources‚ including the K400 User Guide‚ to enhance your brewing experience and resolve any potential issues quickly.

Keurig Website and Online Help

Explore Keurig’s Digital Hub! The official Keurig website provides a wealth of resources‚ including downloadable user manuals in PDF format for the 2.0 brewers. Access how-to videos and detailed instructions for brewing perfect cups.

Find troubleshooting assistance‚ frequently asked questions‚ and registration information. The online help section offers solutions to common issues‚ ensuring a seamless and enjoyable Keurig experience. Discover support tailored to your specific model!

User Forums and Communities

Connect with Fellow Keurig Enthusiasts! Online user forums and communities offer a platform to share experiences‚ tips‚ and troubleshooting advice regarding the Keurig 2.0. Engage in discussions‚ ask questions‚ and learn from other owners.

These communities often provide solutions to unique problems and insights into maximizing your brewer’s potential. Discover hidden features and brewing techniques shared by passionate Keurig users‚ enhancing your coffee journey!

free pdf playboy magazine

Free Playboy Magazine PDFs: A Comprehensive Guide (Updated 12/11/2025)

Discover a vast archive of Playboy magazines available as free PDFs on the Internet Archive, spanning volumes from 1969 to 1988 and beyond, often scanned at high resolutions like 600DPI.

Accessing decades of Playboy magazine content is now remarkably achievable through digital archives, primarily the Internet Archive. This resource provides a legal avenue to explore historical issues in PDF format, offering enthusiasts, researchers, and collectors a unique opportunity. These aren’t simply images; many are fully searchable thanks to OCR (Optical Character Recognition) technology.

The availability ranges from individual articles to complete volumes, like those spanning January 1969 – December 1973 (Vol 16-20) and January 1984 – December 1988 (Vol 31-35). Understanding the archive’s structure and utilizing effective search terms are key to unlocking this treasure trove of cultural history. The scans often boast impressive detail, with some reaching 800 PPI, ensuring a high-quality viewing experience.

The Internet Archive as a Primary Source

The Internet Archive stands as the preeminent digital library offering free access to a vast collection of digitized materials, including numerous Playboy magazine issues. It functions as a non-profit, striving to provide “universal access to all knowledge.” For researchers and enthusiasts seeking historical context, the archive provides original source material, circumventing reliance on secondary interpretations.

Its strength lies in its commitment to preservation and open access. The Playboy PDFs available are often accompanied by detailed metadata, including OCR information (like language and confidence levels) and scanning parameters (PPI). This allows for robust searching and verification of content. The archive’s platform facilitates both download and online viewing, making it a versatile resource for exploring these historical publications.

Navigating the Internet Archive for Playboy Issues

Accessing Playboy magazine PDFs on the Internet Archive requires a strategic approach. Begin with broad searches using terms like “Playboy magazine” or “Playboy archive.” Refine results by specifying year ranges (e.g., “Playboy 1969-1973”). Utilize the “Advanced Search” option for precise queries, filtering by date, creator, and media type (PDF).

Pay attention to item details; metadata reveals scan quality (600DPI scans are preferable) and OCR status. Look for collections or user uploads (like “associate-jercyl-tradioarchive.org” or “associate-jannine-ompadarchive.org”). Be aware of potential issues like “Pdf_degraded: invalid-jp2-headers” and explore alternative uploads if encountered. Consistent searching and patience are key to uncovering desired issues.

Specific Playboy Volumes Available for Download

The Internet Archive currently hosts substantial runs of Playboy magazine in PDF format. Notably, complete volumes are available from January 1969 to December 1973 (Vol 16-20), and January 1984 to December 1988 (Vol 31-35). Individual issues within these ranges are generally accessible for download or borrowing.

Furthermore, specific publications like the Playboy Guide to Electronic Entertainment (Fall 1980) are also archived, often scanned at a high 600DPI resolution and processed with OCR. Users can browse related items (“Previous_item” and “Next_item” links) to discover adjacent issues or connected content within the archive’s digital collection.

Playboy January 1969 ⎯ December 1973 (Vol 16-20)

A significant collection spanning Playboy’s Vol. 16-20 (January 1969 – December 1973) is freely available on the Internet Archive. These PDFs utilize Tesseract 5.0.0-alpha-20201231-10-g1236 for OCR processing, achieving a detected language confidence of 1.0000 for English text. While the script detection confidence is lower at 0.7357, the content is generally searchable.

Each issue contains approximately 233 pages, though this can vary. The archive provides links to related items (e.g., “sim_playboy_1973-01_20_1”), facilitating exploration of consecutive issues. Users should be aware of potential PDF degradation issues, though the core content remains accessible.

Playboy January 1984 ⎯ December 1988 (Vol 31-35)

Playboy magazines from January 1984 to December 1988, encompassing Volumes 31-35, are readily accessible as free PDFs via the Internet Archive. These issues benefit from high-resolution 800 PPI scans and utilize Tesseract 5.3.0-6-g76ae for OCR, boasting a 1.0000 confidence level for English language detection and 0.9674 for script.

Each volume averages around 230 pages. A common issue noted within these archived PDFs is “Pdf_degraded: invalid-jp2-headers,” though content remains largely viewable. Related issues are linked (e.g., “sim_playboy_playboy_1989-12_36_12”), aiding sequential browsing.

Understanding PDF Quality and Resolution

The quality of freely available Playboy magazine PDFs varies, but many benefit from high-resolution scans. A crucial factor is the PPI (pixels per inch) – scans at 600DPI and even 800 PPI, as seen in some Internet Archive offerings, provide significantly sharper images and clearer text compared to lower resolutions. This detail is vital for readability and preservation of the original aesthetic.

Furthermore, the presence of OCR (Optical Character Recognition) transforms scanned images into searchable and selectable text. The Tesseract engine, versions 5.0 and 5.3, are frequently used, with confidence levels often exceeding 95%, enhancing usability.

The Significance of 600DPI Scans

600DPI scans represent a sweet spot for archiving Playboy magazines, balancing file size with exceptional image clarity. Compared to lower resolutions, 600DPI captures intricate details – crucial for appreciating the magazine’s photography and artwork. Many issues on the Internet Archive, including the Playboy Guide to Electronic Entertainment (Fall 1980), are available in this format.

This resolution ensures that text remains crisp and legible even when zoomed in, aiding in research or simply enjoying the reading experience. While 800 PPI scans exist, 600DPI provides a substantial improvement over standard scans, offering a high-quality digital preservation of these publications.

OCR (Optical Character Recognition) Explained

OCR, or Optical Character Recognition, is a vital technology for making archived Playboy PDFs searchable and accessible. It converts scanned images of text into machine-readable text data. The Internet Archive utilizes Tesseract OCR, versions 5.0.0-alpha and 5.3.0-6, to process these magazines.

This allows users to find specific articles or keywords within the PDFs, rather than simply browsing visually. OCR detection confidence levels, often reaching 100% for page numbers, indicate the accuracy of the conversion. While not always perfect, OCR significantly enhances the usability of these digital archives, making research and exploration much easier.

Potential Issues with Archived PDFs

Downloading Playboy PDFs from the Internet Archive may present some technical challenges. A common error encountered is “Pdf_degraded: invalid-jp2-headers,” indicating a problem with the image compression within the PDF file. This doesn’t necessarily mean the file is corrupted, but it might affect viewing or printing.

Other potential issues include incomplete scans or inaccuracies introduced during the OCR process; While many files are scanned at high resolutions like 800DPI, some may be lower quality. Users should be prepared for occasional imperfections and may need to experiment with different PDF viewers to ensure optimal display.

“Pdf_degraded: invalid-jp2-headers” Error

The “Pdf_degraded: invalid-jp2-headers” error signifies a problem with the JPEG 2000 compression used within the PDF. This often occurs during the archiving process and doesn’t necessarily indicate a completely corrupted file. It suggests the PDF viewer struggles to interpret the image data correctly.

Solutions include trying a different PDF reader (Adobe Acrobat, Foxit Reader, etc.) or attempting to repair the PDF using online tools. Updating your PDF viewer to the latest version can also resolve compatibility issues. While frustrating, this error doesn’t always prevent access to the content, and alternative viewers often succeed in rendering the file.

Legal Considerations Regarding Downloaded Content

Downloading Playboy magazine PDFs, even from sources like the Internet Archive, carries legal implications. While the Internet Archive facilitates access, users are responsible for respecting copyright laws. Downloading and distributing copyrighted material without permission is illegal.

The legality hinges on factors like fair use, which allows limited use for criticism, commentary, or research. However, simply downloading for personal enjoyment generally isn’t considered fair use. Consider the age of the publication; older issues may have lapsed copyrights, but verifying this is crucial. Always prioritize respecting intellectual property rights and understand the potential legal risks involved.

Copyright and Fair Use Implications

Copyright law protects Playboy magazine’s content, including text and images. Downloading PDFs doesn’t transfer ownership; it remains with the copyright holder. Fair use allows limited use without permission, but its application is complex.

Factors considered include the purpose and character of the use (commercial vs. non-profit educational), the nature of the copyrighted work, the amount used, and the effect on the market. Downloading entire issues for personal enjoyment typically doesn’t qualify as fair use. Transformative uses, like critical analysis, are more likely to be protected. Understanding these nuances is vital when accessing archived Playboy PDFs.

Alternative Sources for Playboy Magazine PDFs

While the Internet Archive is a primary source, locating Playboy magazine PDFs can involve exploring other avenues. Various online forums and communities dedicated to magazine collecting sometimes share links or offer digitized copies, though legality can be questionable. Be cautious of websites promising free downloads, as they may contain malware or infringe on copyright.

University libraries with extensive digital collections might offer access to archived issues, often through institutional subscriptions. Furthermore, specialized digital libraries focusing on 20th-century periodicals could hold relevant materials. Always prioritize legitimate sources and respect copyright restrictions when seeking these publications.

Using Search Terms Effectively on the Internet Archive

To efficiently locate Playboy magazine PDFs on the Internet Archive, refine your search queries. Utilize specific keywords like “Playboy” combined with the year (e.g., “Playboy 1972”). Adding “PDF” to the search string narrows results considerably. Explore variations like “Playboy magazine” or “Playboy Vol. 18 No. 5”.

Leverage the advanced search options for more precise targeting. Experiment with metadata fields, such as “creator” or “subject”. Remember that the archive’s indexing isn’t perfect; trying multiple related terms increases your chances of success. Boolean operators (AND, OR, NOT) can further refine searches for specific issues or content.

Keywords for Specific Years and Issues

For targeted searches, combine “Playboy” with precise year ranges. For example, “Playboy 1969-1973” will locate issues from those volumes. To find a specific month, use “Playboy January 1969”. Including the volume and issue number, like “Playboy Vol. 16 No. 1”, yields highly focused results.

Experiment with variations: “Playboy magazine 1984”, “Playboy December 1988”, or “Playboy Vol. 35”. The Internet Archive’s metadata sometimes includes descriptive terms; try adding “index” or “magazine” to your query. Remember to check for alternative spellings or abbreviations. Consistent experimentation with keyword combinations is key to uncovering desired issues.

The Playboy Guide to Electronic Entertainment (Fall 1980)

A notable find within the Internet Archive is the “Playboy Guide to Electronic Entertainment” from Fall 1980. This special issue, available as a free PDF, offers a fascinating glimpse into the early days of video games and home computing. Scanned at a high 600DPI resolution, the PDF is also OCR’d, enabling text searching and accessibility.

This guide represents a unique historical document, showcasing Playboy’s coverage of emerging technologies. It’s a valuable resource for video game history enthusiasts and those interested in the cultural impact of early electronic entertainment. The PDF’s metadata confirms its origin and details the scanning and OCR processes used for preservation.

Metadata Details within the Internet Archive Files

Each Playboy magazine PDF on the Internet Archive is accompanied by detailed metadata, providing valuable information about the file itself. Key details include the OCR software used – often Tesseract, versions 5.0.0 to 5;3.0 – and confidence levels for language detection (typically 1.0000 for English). Script detection also appears, with varying confidence scores.

Further metadata specifies the scanning resolution (often 800 PPI), PDF module version, and page count (ranging from 230-233 pages in available samples). Notably, many files are flagged with “Pdf_degraded: invalid-jp2-headers,” indicating potential issues. This data assists users in assessing PDF quality and understanding the archiving process.

Ocr_detected_lang and Ocr_detected_script

The Internet Archive’s Playboy magazine PDFs utilize Optical Character Recognition (OCR) to enable text searching and accessibility. Metadata consistently reveals “Ocr_detected_lang: en,” confirming English as the recognized language with a high confidence score of 1.0000. This ensures accurate text extraction for most issues.

Alongside language, “Ocr_detected_script: Latin” identifies the character set used, crucial for correct rendering. Confidence levels for script detection vary, ranging from 0.6749 to 0.9674, potentially indicating complexities in certain scans. These metadata tags are vital for understanding the OCR process and potential text accuracy within the digitized Playboy archives.

Software Required to Open and View PDFs

Accessing the free Playboy magazine PDFs from the Internet Archive requires readily available software. Adobe Acrobat Reader is the industry standard, offering reliable viewing and basic functionality. However, numerous free alternatives exist, including SumatraPDF, known for its speed and simplicity, and Foxit Reader, providing a feature-rich experience.

For PDFs with potential issues – like those flagged with “Pdf_degraded” – more robust viewers might be necessary. Consider PDF-XChange Editor (free version available) or dedicated PDF repair tools. Ensure your chosen software supports JP2 decoding, given some archives report “invalid-jp2-headers”.

Troubleshooting PDF Opening Problems

Encountering issues opening Playboy PDFs from the Internet Archive is common. If a file fails to load, first update your PDF viewer (Adobe Acrobat Reader, SumatraPDF, etc.). The “Pdf_degraded: invalid-jp2-headers” error suggests a corrupted file; try a different viewer or a PDF repair tool.

Low “Page_number_confidence” scores might indicate OCR errors. If text is unreadable, ensure Tesseract OCR is functioning correctly within your viewer. A Ppi of 800 should provide clarity, but lower resolutions (like the reported 80 Ppi) may require zooming. Finally, verify your system meets the minimum requirements for handling large PDF files.

The Role of Tesseract OCR in Archiving

Tesseract OCR plays a crucial role in making these archived Playboy PDFs searchable and accessible. Versions like 5.3.0-6-g76ae and 5.0.0-alpha-20201231-10-g1236 are frequently used by the Internet Archive to convert scanned images into machine-readable text. This process, while not always perfect, allows users to find specific articles or content within the magazines.

The “Ocr_detected_lang” and “Ocr_detected_script” metadata confirm Tesseract’s language identification (English/Latin). Higher “Ocr_detected_lang_conf” scores (like 1.0000) indicate greater accuracy. Despite potential script confidence variations (0.6749 to 0.9674), Tesseract significantly enhances the usability of these digital archives.

Understanding Page Number Confidence Levels

Within the Internet Archive’s Playboy PDF metadata, “Page_number_confidence” is a key indicator of OCR accuracy. A consistent 100% confidence level, as noted across many archived issues, suggests Tesseract OCR reliably identified page numbers during processing. This is vital for navigating the digital magazines and verifying content integrity.

The “Page_number_module_version” (currently 1.0.5) reflects the algorithm used for page number detection. While high confidence is typical, variations can occur due to image quality or complex layouts. Reliable page number recognition, coupled with OCR, transforms static scans into functional, searchable digital replicas of these Playboy volumes.

Future of Playboy Magazine Digital Archives

The longevity of these Playboy magazine PDFs on the Internet Archive hinges on continued digital preservation efforts. As technology evolves, maintaining compatibility with future software and formats will be crucial. Further improvements to Tesseract OCR could enhance searchability and accuracy within existing scans.

Community contributions, including user-submitted corrections and higher-resolution scans, could significantly enrich the archive. Addressing the “Pdf_degraded: invalid-jp2-headers” errors will also be vital. The ongoing digitization of back issues, coupled with robust metadata, ensures these historical documents remain accessible for research and enjoyment for years to come.

Please note that accessing and downloading these Playboy magazine PDFs is subject to individual responsibility regarding copyright laws and terms of service of the Internet Archive. While many issues are available for free download and borrowing, users must respect intellectual property rights.

This guide provides information about locating these archives; it does not endorse or encourage any illegal activities. Content within these magazines may be considered mature or offensive by some viewers. Users are advised to exercise discretion and adhere to all applicable local regulations concerning access to such materials. We are not liable for any misuse of this information.

peak flow chart pdf nhs

Understanding Peak Flow Charts & NHS Guidance

Peak flow charts, often available as PDF downloads from the NHS, are crucial tools for asthma self-management, enabling individuals to track their respiratory health effectively.

These charts help record scores, assisting in recognizing patterns and adjusting medication as needed, alongside comprehensive NHS asthma action plans.

What is Peak Flow Measurement?

Peak flow measurement assesses how quickly you can exhale air from your lungs, providing a valuable indicator of airway obstruction, a common issue in asthma. This measurement, expressed in liters per minute (L/min), is obtained using a peak flow meter, a handheld device readily available and often utilized alongside NHS-provided peak flow charts – frequently downloadable as PDF documents.

The process involves taking a deep breath and then blowing into the meter with as much force as possible. Multiple readings are typically taken, and the highest score is recorded on the peak flow chart. Regular monitoring helps establish a ‘personal best’ peak flow, serving as a baseline for comparison. Changes from this baseline, tracked on the chart, signal potential asthma flare-ups, prompting adjustments to medication or seeking medical advice, as outlined in NHS guidance.

It’s a simple, non-invasive test empowering individuals to actively participate in their asthma management.

Why Use a Peak Flow Chart?

Utilizing a peak flow chart, often accessible as a PDF from NHS resources, empowers individuals with asthma to proactively manage their condition. These charts facilitate the early detection of worsening airway obstruction, even before noticeable symptoms like wheezing or shortness of breath appear. Consistent monitoring, recording readings daily or as directed, establishes a personal baseline and identifies trends.

The NHS emphasizes integrating peak flow monitoring with asthma action plans. The chart visually represents zones – green, yellow, and red – indicating the severity of airway function. This allows for timely medication adjustments, potentially preventing severe asthma attacks. Regular charting aids in communicating effectively with healthcare professionals, providing objective data about lung function over time. Downloading a peak flow diary (PDF) from the Asthma UK website or NHS sites simplifies this process.

The Peak Flow Meter

Peak flow meters, used with NHS-provided charts (often PDF format), measure how quickly air is expelled from the lungs, aiding asthma management and monitoring.

Types of Peak Flow Meters Available

Several types of peak flow meters exist, catering to different needs and preferences, though the NHS generally supports consistent monitoring using any validated device alongside their peak flow chart PDF resources.

Traditional mechanical meters are widely available and affordable, displaying readings on a numbered scale; these require manual recording onto a chart; Digital peak flow meters offer a more modern approach, often storing readings and connecting to smartphone apps for easier tracking and data analysis.

Some meters are designed specifically for children, featuring simplified designs and potentially color-coded zones aligning with NHS guidance. Regardless of the type, ensuring the meter is clean and calibrated is vital for accurate readings. The NHS emphasizes that the key is consistent monitoring, not necessarily the specific meter used, when paired with their downloadable charts.

How to Use a Peak Flow Meter Correctly

Correct peak flow meter usage is vital for accurate readings, especially when utilizing an NHS peak flow chart PDF for tracking. Begin by standing upright, ensuring nothing obstructs your airway.

Take a deep breath, filling your lungs completely, then place the meter’s mouthpiece firmly in your mouth, sealing your lips around it. Blow out as hard and fast as possible in a single, continuous effort – think of blowing out candles on a birthday cake.

Repeat this process three times, with short rests between each attempt. Record the highest of the three readings on your NHS-provided chart. Consistency in technique is key; the NHS emphasizes following these steps to ensure reliable data for effective asthma management.

Preparing to Take a Reading

Before utilizing your peak flow meter and recording data on an NHS peak flow chart PDF, proper preparation is essential for accurate results. Ensure you are standing comfortably, as posture impacts airflow.

Confirm the meter is clean and functioning correctly. Familiarize yourself with the markings on the chart to understand the expected range for your personal best. It’s best to take readings at the same time each day, ideally in the morning before medication, and in the evening, as directed by your NHS healthcare provider.

Avoid vigorous activity or eating immediately before testing. Having your NHS asthma action plan and chart readily available streamlines the process, promoting consistent monitoring.

Taking the Measurement – Step-by-Step

To accurately measure your peak flow, and record it on your NHS peak flow chart PDF, follow these steps. Stand upright and take a deep breath, filling your lungs completely. Place the mouthpiece firmly in your mouth, ensuring a tight seal with your lips.

Blow out as hard and as fast as you can in a single, continuous breath. This requires effort – aim for a forceful exhalation. Repeat this process three times, allowing brief rests between each attempt.

Record the highest of the three readings on your NHS chart. This value represents your peak expiratory flow rate. Consistent technique is vital for reliable monitoring and effective asthma management, as guided by your NHS care plan.

Recording Your Peak Flow Readings

Consistent and accurate recording of your peak flow readings on your NHS peak flow chart PDF is essential for effective asthma management. After taking your measurement – remembering to record the highest of three attempts – clearly note the date and time alongside the reading.

Use a pen to mark your score on the chart, often indicated by a cross or dot. Pay attention to the zones (green, yellow, red) on the chart, as these provide immediate guidance on your asthma control.

Regularly review your recorded data with your healthcare provider, as trends can inform adjustments to your medication plan. Downloadable NHS charts facilitate this process, supporting proactive asthma self-management.

Interpreting Your Peak Flow Readings

Understanding your peak flow readings, tracked on an NHS peak flow chart PDF, is vital; these measurements indicate lung function and guide asthma management decisions.

Personal Best Peak Flow

Determining your personal best peak flow is a foundational step in utilizing a peak flow chart, often downloadable as a PDF from the NHS. This represents the highest reading you can consistently achieve when your asthma is well-controlled and you’re feeling your best.

To establish this baseline, diligently record your peak flow readings twice daily for two to three weeks, following the instructions provided with your meter and the NHS guidance; The highest of these readings becomes your personal best.

This value is crucial because it serves as the benchmark against which all future readings are compared. The NHS asthma action plan, often integrated with peak flow monitoring, relies heavily on this personal best to define the green, yellow, and red zones, guiding appropriate medication adjustments and when to seek medical attention. Regularly updating this value, if your asthma improves with treatment, is also recommended.

Zones of Peak Flow – Green, Yellow, and Red

Peak flow charts, readily available as PDFs from the NHS, categorize readings into three zones – green, yellow, and red – to guide asthma management. Understanding these zones is vital for self-assessment and appropriate action.

The green zone (80-100% of your personal best) indicates excellent control; continue your regular medication. The yellow zone (50-79%) signals caution – asthma is deteriorating. NHS guidance suggests increasing reliever medication and monitoring symptoms closely.

The red zone (below 50%) demands immediate medical attention. This signifies severe airway obstruction, potentially requiring emergency treatment. The NHS asthma action plan, often used alongside the peak flow chart, details specific steps for each zone. Consistent monitoring and adherence to these zones, as outlined in the NHS PDF resources, are key to effective asthma control.

Green Zone: All Clear

The green zone, prominently displayed on NHS peak flow charts often available as a PDF download, signifies optimal asthma control. This zone represents readings between 80% and 100% of your personal best peak flow measurement, indicating clear airways and minimal inflammation.

When consistently within the green zone, you should continue your regular, prescribed asthma medications as directed by your healthcare provider. NHS guidance emphasizes maintaining this stability by adhering to your long-term control medications.

No additional action is typically required within this zone, but continued monitoring with the peak flow meter and chart is essential. The NHS asthma action plan, often used in conjunction with the chart, reinforces this proactive approach, ensuring sustained respiratory wellness.

Yellow Zone: Caution

The yellow zone on an NHS peak flow chart (often downloadable as a PDF) indicates a potential worsening of asthma symptoms and requires increased attention. This zone encompasses peak flow readings between 50% and 79% of your personal best, signaling some airway narrowing.

NHS guidance suggests that when entering the yellow zone, you should follow your asthma action plan, which may involve increasing your reliever medication (usually a blue inhaler) as prescribed. Monitor your symptoms closely – wheezing, coughing, or shortness of breath – and record any changes on your chart.

If symptoms don’t improve within a specified timeframe, or if they worsen, the NHS recommends seeking medical advice. The yellow zone serves as a crucial warning sign, prompting proactive management to prevent progression to the red zone.

Red Zone: Medical Attention Needed

The red zone on an NHS peak flow chart (available as a PDF download) signifies severe airway obstruction and demands immediate medical intervention. Readings in this zone are typically below 50% of your personal best, indicating a significant asthma exacerbation.

NHS guidance clearly states that if your peak flow falls into the red zone, you should use your reliever inhaler immediately, following the instructions in your asthma action plan. However, this is not a substitute for seeking urgent medical help.

You must call 999 or go to the nearest Accident & Emergency department. Symptoms accompanying a red zone reading often include severe shortness of breath, inability to speak in full sentences, and a blue tinge to the lips or fingers. Do not delay seeking assistance; prompt treatment is vital.

NHS Peak Flow Charts & Resources

The NHS provides downloadable peak flow charts as PDFs, alongside asthma action plans, to empower patients to actively monitor and manage their respiratory conditions effectively.

Downloading NHS Peak Flow Charts (PDF)

Accessing NHS peak flow charts in PDF format is straightforward, facilitating convenient home monitoring for asthma sufferers. Several NHS Trusts directly offer downloadable charts on their websites; Gloucestershire Hospitals NHS Foundation Trust provides a peak flow diary (PDF, 1.06MB) specifically designed for recording measurements.

These readily available resources enable patients to diligently track their peak expiratory flow rates, a vital component of asthma management. NHS resources emphasize the importance of consistent recording, using the highest of three readings for accuracy.

Furthermore, many local healthcare providers can furnish physical copies of these charts, or direct you to the appropriate online location for PDF downloads. Utilizing these NHS-approved charts ensures alignment with national guidelines and supports effective asthma control.

NHS Asthma Action Plans & Peak Flow Integration

NHS Asthma Action Plans are designed to empower patients to self-manage their condition, and peak flow monitoring is a central component of this approach. These plans, often used in conjunction with a downloaded peak flow chart (PDF), outline specific actions to take based on peak flow readings and symptom severity.

The Gloucestershire Hospitals NHS Foundation Trust highlights the integration of peak flow diaries within their Asthma Action Plans, emphasizing how regular monitoring informs medication adjustments.

Action plans categorize readings into zones – green, yellow, and red – guiding patients on when to continue routine medication, add reliever medication, or seek urgent medical attention. Consistent use of a peak flow chart PDF, alongside the plan, allows for proactive asthma control and reduces the risk of severe exacerbations, aligning with NHS best practices.

Peak Flow Charts for Different Age Groups

NHS resources provide tailored peak flow charts (PDF format) for both adults and children, recognizing varying lung capacity and normal ranges across different developmental stages.

Peak Flow Charts for Adults

NHS-provided peak flow charts for adults, frequently downloadable as PDF documents, are designed to help individuals with asthma monitor their lung function and manage their condition proactively.

These charts typically include a zone system – green, yellow, and red – to visually represent the severity of airway obstruction, guiding appropriate action based on readings.

Adult charts often incorporate predicted normal values based on age, height, and gender, allowing for personalized assessment of peak expiratory flow rate (PEFR).

Regular monitoring and recording of PEFR readings on the chart, alongside symptom tracking, enables adults to identify triggers, assess medication effectiveness, and collaborate effectively with healthcare professionals.

The NHS emphasizes using these charts in conjunction with a personalized asthma action plan, ensuring a comprehensive approach to asthma management and minimizing the risk of exacerbations.

Accessing and utilizing these PDF charts empowers adults to take control of their respiratory health.

Peak Flow Charts for Children

NHS peak flow charts specifically designed for children, often available as downloadable PDFs, are vital tools for monitoring asthma in younger patients.

These charts differ from adult versions, utilizing age- and height-based predicted normal values to accurately assess a child’s lung function.

The color-coded zone system (green, yellow, red) remains consistent, providing a clear visual guide for parents or caregivers to understand the severity of airway obstruction.

Consistent monitoring, with the highest of three readings recorded, is crucial, and the NHS stresses the importance of involving children in the process as they get older.

Parents should diligently record readings and symptoms, using the chart to identify patterns and potential triggers.

These charts are best used alongside a personalized asthma action plan developed with a healthcare professional, ensuring optimal asthma control for children.

Managing Asthma with Peak Flow Monitoring

Peak flow monitoring, utilizing NHS downloadable PDF charts, links readings to symptoms, guiding medication adjustments for better asthma control and improved quality of life.

Linking Peak Flow to Asthma Symptoms

Peak flow monitoring, facilitated by readily available NHS peak flow charts – often downloadable as PDF documents – isn’t just about numbers; it’s about understanding your body and recognizing subtle changes.

Consistently recording your peak flow readings alongside a log of your asthma symptoms – like wheezing, coughing, shortness of breath, or chest tightness – allows you to identify triggers and patterns.

For example, a drop in your peak flow score might precede noticeable symptoms, giving you a warning sign to proactively adjust your medication or seek medical advice.

Conversely, experiencing symptoms without a significant change in peak flow could indicate a non-asthma related issue, prompting further investigation.

The NHS emphasizes using these charts to correlate objective measurements with subjective feelings, empowering individuals to take control of their asthma management.

Adjusting Medication Based on Peak Flow

Utilizing an NHS-provided peak flow chart, often accessible as a PDF, is integral to personalized asthma management, particularly when it comes to medication adjustments.

Your Asthma Action Plan, developed with your healthcare provider, will outline specific actions based on your peak flow readings and corresponding zones – green, yellow, and red.

In the green zone (80-100% of your personal best), continue your regular medication schedule.

The yellow zone (50-79%) typically signals a need to increase your reliever medication, as indicated on your NHS plan.

A reading in the red zone (below 50%) demands immediate medical attention and may require a course of oral steroids.

Remember, self-adjusting medication should always be guided by your Asthma Action Plan and regular consultations with your doctor.

Troubleshooting Peak Flow Monitoring

Consistent low readings, despite following NHS guidance and using a peak flow chart PDF, require investigation; factors like illness or technique may influence results.

Factors Affecting Peak Flow Readings

Peak flow readings aren’t always straightforward, and several factors can influence the results recorded on your NHS peak flow chart, whether using a printed version or a PDF downloaded from resources like Gloshospitals.nhs.uk. Common colds or respiratory infections can temporarily lower readings, even if your asthma is generally well-controlled.

Technique is paramount; ensuring a strong, quick exhale is vital for accurate measurement. Variations in effort, or not blowing out hard enough, will lead to inaccurate scores. Environmental factors, like cold air, can also cause airway constriction, impacting readings.

Furthermore, waking up with asthma symptoms – wheezing, shortness of breath, or a tight chest – will naturally result in lower peak flow values. It’s crucial to note these alongside your readings on the chart. Finally, changes in medication or the time of day can also play a role, so consistency is key when monitoring.

What to Do if Readings are Consistently Low

If your peak flow readings, diligently recorded on your NHS peak flow chart (or a PDF version downloaded from NHS resources), are consistently in the yellow or red zone, it’s vital to take action. Don’t ignore persistently low scores, even if you feel relatively well.

First, follow your Asthma Action Plan, which should outline specific steps based on your zone. This may involve increasing your reliever medication, such as a salbutamol inhaler. If symptoms worsen or don’t improve after using your reliever, seek medical attention immediately.

Contact your doctor or NHS 111 for advice, especially if you’re experiencing significant difficulty breathing. Consistently low readings indicate your asthma isn’t well-controlled and requires review. Don’t hesitate to seek professional guidance to adjust your treatment plan.

Resources and Further Information

Asthma UK provides comprehensive guidance, while NHS websites offer peak flow chart PDF downloads and detailed asthma information for effective self-management.

Asthma UK Website

Asthma UK serves as an invaluable resource for individuals seeking to understand and manage their asthma, offering a wealth of information directly applicable to peak flow monitoring.

Their website provides detailed explanations of peak flow measurements, how to interpret readings across the green, yellow, and red zones, and guidance on creating personalized asthma action plans.

You can find downloadable resources, including examples of peak flow charts, though direct PDF downloads of NHS-style charts may redirect to NHS resources.

Asthma UK emphasizes the importance of regular monitoring and linking peak flow readings to symptom control, offering advice on when to seek medical attention.

The site also features a supportive community forum where individuals can share experiences and ask questions, fostering a collaborative approach to asthma management.

Furthermore, Asthma UK actively campaigns for improved asthma care and provides information on rights and access to healthcare services.

NHS Asthma Information Pages

The NHS website offers comprehensive and reliable information regarding asthma management, including detailed guidance on peak flow monitoring and access to downloadable resources.

Specifically, you can find peak flow charts available as PDF documents, designed to help patients track their respiratory health and identify potential asthma exacerbations.

These pages explain the significance of personal best peak flow readings and how to interpret results within the green, yellow, and red zones, aligning with NHS asthma action plans.

The NHS emphasizes the importance of consistent monitoring and provides clear instructions on how to use a peak flow meter correctly, ensuring accurate measurements.

Information is tailored for different age groups, recognizing the variations in normal peak flow rates for adults and children.

The NHS also provides links to local healthcare services and support groups, promoting a holistic approach to asthma care.

the electricians guide to the building regulations electrical regulations

Building regulations establish electrical installation standards‚ primarily for dwellings‚ while commercial/industrial sites fall under Electricity at Work Regulations 1989․ Competent persons are crucial‚ and approval is necessary before any work begins․

The Scope of Regulations: Dwellings vs․ Commercial/Industrial

Building Regulations specifically set standards for electrical installation work undertaken within dwellings – encompassing houses‚ flats‚ and similar residential properties․ This focused approach ensures a baseline level of safety for homeowners and occupants․ However‚ it’s crucial to understand that these regulations do not directly govern electrical installations in industrial or commercial buildings․

Instead‚ these latter environments are subject to the broader requirements of the Electricity at Work Regulations 1989․ This legislation places a general duty on employers‚ employees‚ and self-employed persons to ensure the safety of all electrical systems and equipment used in the workplace․ The distinction highlights the differing risk profiles and operational complexities inherent in residential versus non-residential settings‚ necessitating tailored regulatory frameworks․

The Importance of Competent Persons

Aiming to reduce death from poorly executed electrical installations‚ the regulations unequivocally emphasize the necessity of employing a competent person for all electrical work․ This isn’t merely a recommendation; it’s a fundamental safety requirement․ A competent person possesses the necessary training‚ knowledge‚ and practical experience to undertake electrical work safely and in compliance with BS 7671 and other relevant standards․

This competency extends beyond simply possessing qualifications․ It includes understanding the latest regulations‚ being able to accurately assess risks‚ and implementing appropriate safety measures․ Either an electrician or a competent person should perform the work․ Attempting electrical work without the requisite expertise poses significant dangers – both to the individual undertaking the work and to the occupants of the building․

Building Regulations Approval: A Necessity

Before carrying out any electrical work‚ securing Building Regulations approval is not optional – it’s a legal requirement‚ particularly for installations within dwellings (houses and flats)․ This process ensures that the work meets the required safety standards and minimizes the risk of electrical hazards․ Approval can be obtained through several routes‚ including self-certification schemes operated by registered competent persons․

Failing to obtain approval when required can lead to serious consequences‚ including fines and legal repercussions․ The approval process typically involves notification to the local Building Control body‚ followed by inspection and testing to verify compliance․ It’s a crucial step in safeguarding lives and property‚ demonstrating a commitment to safety and adherence to legal obligations․

Part P of the Building Regulations: Specifics

Part P covers electrical safety in dwellings‚ defining notifiable and non-notifiable work․ Compliance ensures installations are safe‚ and often requires a competent person’s certification․

What is Part P?

Part P of the Building Regulations specifically addresses electrical safety within domestic properties – houses‚ flats‚ and other dwellings․ Introduced in 2005‚ its primary aim is to reduce the risk of injury or death caused by faulty electrical installations․ It achieves this by mandating that certain electrical work must be carried out by registered‚ competent persons‚ or be subject to Building Control notification and inspection․

Essentially‚ Part P doesn’t dictate how electrical work should be done – that’s covered by BS 7671 (the IET Wiring Regulations) – but rather who can do it and ensuring the work is verified․ This verification process confirms the installation meets the required safety standards․ It’s a crucial element in protecting homeowners and ensuring electrical installations are safe and compliant․

Notifiable Electrical Work

Notifiable electrical work‚ as defined by Part P‚ encompasses installations that could significantly impact electrical safety․ This includes the creation of new circuits‚ alterations to existing circuits (like adding sockets or lights)‚ and the installation of new electrical equipment in special locations – bathrooms‚ kitchens‚ outdoors‚ or within a building’s structure․

Replacing a complete consumer unit (fuse box) is always notifiable․ Any work in a garden‚ or where a special location is involved‚ requires notification to Building Control unless the electrician is registered with a competent person scheme․ Failing to notify can result in penalties․ Registered electricians self-certify their work‚ streamlining the process and ensuring compliance with Part P regulations․

Non-Notifiable Electrical Work

Non-notifiable electrical work generally involves minor repairs or replacements that pose a low risk to electrical safety․ Examples include replacing a single socket like-for-like (same position‚ same type)‚ swapping a light fitting for an identical one‚ or replacing a fuse․ However‚ even seemingly simple tasks can become notifiable if they involve alterations to the existing circuit configuration․

Crucially‚ “like-for-like” replacements must be truly identical․ Adding a new light where none existed before‚ or changing to a different type of fitting‚ will likely require notification․ While not subject to formal Building Control approval‚ all electrical work must still be carried out safely and competently‚ adhering to BS 7671 standards․

Electrical Safety Regulations & Standards

BS 7671‚ the IET Wiring Regulations‚ and the Electricity at Work Regulations 1989 are foundational for electrical safety‚ ensuring installations are compliant and safe․

BS 7671: The IET Wiring Regulations

BS 7671‚ commonly known as the IET Wiring Regulations‚ is the national standard for the safe design‚ installation‚ and verification of electrical installations in the UK․ It’s a living document‚ regularly updated to reflect advancements in technology and safety practices․ Electricians must adhere to these regulations to ensure installations are safe and compliant with legal requirements․

The regulations cover a vast range of topics‚ from cable selection and sizing to earthing arrangements and protective device coordination․ Understanding BS 7671 is paramount for any electrician working within the UK‚ as it forms the basis for all electrical inspection and testing procedures․ Compliance isn’t merely about avoiding penalties; it’s about protecting lives and property․

Regular updates and amendments are crucial to stay current with the latest requirements‚ ensuring installations meet the highest safety standards․

Electricity at Work Regulations 1989

The Electricity at Work Regulations 1989 place a legal duty on employers‚ self-employed persons‚ and those in control of electrical systems to ensure safety․ Unlike building regulations which focus on dwellings‚ these regulations cover all electrical work‚ particularly in commercial and industrial settings․ They mandate that all electrical systems are safe to use and maintained in a safe condition․

Key requirements include preventing danger‚ ensuring systems are constructed and maintained to prevent risk‚ and providing information‚ instruction‚ and training to those working with electricity․ Regular inspections and testing are vital to demonstrate compliance․ These regulations complement BS 7671‚ providing a broader legal framework for electrical safety․

Failure to comply can result in significant penalties․

Key Areas Covered by Electrical Regulations

Electrical regulations encompass distribution within buildings‚ fire safety including cabling‚ and crucial emergency lighting and exit signage for safe evacuation routes․

Electrical Distribution within Buildings

Electrical distribution within a building is heavily regulated to ensure safety and efficiency․ Regulations cover everything from the main intake point to the final circuit supplying power to outlets and appliances․ Part B of the building regulations often dictates the need for fire-resistant cabling to prevent fire spread through wiring systems‚ a critical safety measure․

Proper zoning of circuits is essential‚ separating lighting‚ power‚ and specialized equipment onto dedicated circuits․ Regulations also address cable sizing‚ ensuring adequate capacity to handle anticipated loads without overheating․ The layout must consider accessibility for future maintenance and modifications․ Furthermore‚ electrical installations must adhere to specific requirements regarding earthing and bonding to minimize the risk of electric shock․ Compliance with these standards is paramount for a safe and reliable electrical system․

Fire Safety & Electrical Installations

Fire safety is a core concern within building regulations concerning electrical installations․ Regulations aim to minimize fire ignition risks and prevent fire spread․ A key requirement is often the use of fire-resistant cabling‚ designed to maintain circuit integrity during a fire‚ allowing vital systems like emergency lighting to function․

Electrical installations must not compromise fire compartmentation‚ meaning wiring must be installed to maintain the fire resistance of walls and floors․ Regulations dictate appropriate cable containment systems‚ such as conduit or trunking‚ to protect wiring from physical damage and limit fire propagation․ Furthermore‚ consideration must be given to potential ignition sources‚ such as overloaded circuits or faulty equipment‚ and appropriate protective measures implemented․ Compliance ensures a safer building environment during fire emergencies․

Emergency Lighting & Exit Signage

Emergency lighting and exit signage are critical components of building safety‚ directly linked to electrical installations and building regulations․ These systems must reliably guide occupants to safety during power outages or emergencies․ Regulations specify requirements for the provision‚ placement‚ and performance of both systems․

Electrical installations supporting emergency systems require dedicated circuits‚ often supplied by a backup power source like a generator or battery system․ Part B of the regulations often mandates fire-resistant cabling for these circuits․ Exit signs must be clearly visible‚ illuminated‚ and strategically positioned along escape routes․ Regular testing and maintenance of emergency lighting and signage are legally required to ensure continued functionality and compliance with safety standards․

Specific Installation Requirements

Earthing and bonding‚ RCDs‚ and appropriate circuit protection are vital for safety․ These installations must adhere to BS 7671 standards for reliable operation․

Earthing and Bonding

Earthing and bonding are fundamental to electrical safety‚ creating a low-resistance path for fault currents to flow back to the source‚ tripping protective devices․ BS 7671 details requirements for effective earthing arrangements‚ including main earthing terminals (METs) and supplementary bonding․

Bonding connects extraneous conductive parts – like metal pipes and structural steel – to the earthing system‚ equalizing potential and reducing touch voltages․ Proper bonding minimizes the risk of electric shock․ Different earthing systems (TN-S‚ TN-C-S‚ TT) dictate specific bonding requirements․ Careful consideration must be given to equipotential zones within a building․ Incorrect earthing or bonding can compromise the entire electrical installation’s safety‚ leading to dangerous situations and potential regulatory breaches․

Residual Current Devices (RCDs)

Residual Current Devices (RCDs) are vital safety components‚ rapidly disconnecting circuits in the event of a fault current to earth․ BS 7671 mandates RCD protection for specific circuits‚ including those supplying socket-outlets‚ bathrooms‚ and outdoor areas․ RCDs detect imbalances between live and neutral conductors‚ indicating current leakage․

Regulations specify appropriate RCD tripping currents (typically 30mA for personal protection) and types (Type A‚ Type AC‚ Type B) based on the potential for harmonic distortion․ Correct RCD selection and installation are crucial; improper installation can lead to nuisance tripping or‚ worse‚ failure to operate during a genuine fault․ Regular testing of RCDs is essential to verify their functionality and ensure continued protection․

Circuit Protection

Circuit protection‚ governed by BS 7671‚ is paramount for safety and preventing damage․ Overcurrent Protective Devices (OCPDs)‚ like Miniature Circuit Breakers (MCBs) and fuses‚ safeguard against excessive current flow due to overloads or short circuits․ Regulations dictate appropriate cable sizing and OCPD ratings to match circuit loads․

Each circuit must have its own dedicated OCPD‚ positioned at the circuit’s origin․ BS 7671 details specific requirements for different circuit types‚ considering factors like cable characteristics and intended use․ Proper selection and installation are vital; undersized cables or incorrectly rated OCPDs pose fire risks․ Supplementary Protective Devices (SPDs) offer surge protection‚ mitigating damage from transient overvoltages․

Inspection and Testing

Initial verification confirms a new installation’s safety‚ while periodic inspection and testing assesses existing installations․ Electrical Installation Certificates document compliance and safety․

Initial Verification

Initial verification is a comprehensive assessment performed on a newly installed or completely rewired electrical installation․ It’s a crucial step to ensure the installation meets BS 7671 standards and is safe for immediate use․ This process goes beyond simply checking connections; it involves a series of detailed tests‚ including insulation resistance tests‚ continuity tests of protective conductors‚ polarity checks‚ and earth fault loop impedance tests․

The electrician meticulously documents all findings‚ rectifying any deviations from the regulations before issuing an Electrical Installation Certificate․ This certificate confirms the installation’s safety and compliance‚ providing legal documentation for the homeowner or building owner․ Proper initial verification is paramount for preventing electrical hazards and ensuring long-term reliability․

Periodic Inspection and Testing

Periodic Inspection and Testing (PIT) is a routine check of an existing electrical installation‚ conducted at regular intervals – typically every 5 or 10 years‚ or upon a change of tenancy․ Unlike initial verification‚ PIT assesses the condition of an installation that’s already in use‚ identifying any deterioration or faults that may have developed over time․

The inspection involves a visual examination of the installation‚ followed by a series of tests similar to those performed during initial verification․ Any identified defects are reported‚ and remedial work is recommended․ A Electrical Installation Condition Report (EICR) is then issued‚ detailing the installation’s condition and safety․ PIT is vital for maintaining electrical safety and preventing fires or shocks․

Electrical Installation Certificates

Upon completion of new installations‚ or significant alterations‚ an Electrical Installation Certificate (EIC) is legally required․ This document confirms that the work has been carried out in accordance with BS 7671 (the IET Wiring Regulations) and is safe for use․ The EIC details the scope of the work‚ the test results‚ and the electrician’s qualifications․

For minor works‚ an Electrical Installation Minor Works Certificate may be issued․ Crucially‚ the EIC or Minor Works Certificate must be provided to the homeowner or building owner‚ and a copy submitted to Building Control if the work was notifiable under Part P․ Accurate and complete certification is essential for legal compliance and demonstrating electrical safety․

Amendments and Updates to Regulations

Recent changes to the EIR and ECSR have been implemented after public consultation․ Electricians must stay up-to-date with these evolving regulations for compliance․

Recent Changes to EIR and ECSR

Recent amendments to the Electrical Installations Regulations (EIR) and the Electricity Supply Connection and Provision Regulations (ECSR) represent significant updates for electricians․ These changes followed extensive public consultation‚ demonstrating a commitment to incorporating industry feedback and enhancing safety standards․

While specific details vary‚ updates often focus on clarifying existing requirements‚ introducing new technologies‚ and addressing emerging risks within electrical installations․ Staying informed about these revisions is paramount for ensuring compliance and delivering safe‚ reliable electrical work․ Electricians should actively seek information regarding these changes through industry publications‚ training courses‚ and official regulatory bodies․

Furthermore‚ understanding the rationale behind these amendments allows for a more comprehensive approach to electrical installations‚ promoting best practices and minimizing potential hazards․ VirtualDJ’s support for numerous controllers exemplifies the constant evolution within related technological fields․

Staying Up-to-Date with Regulations

Continuous professional development is vital for electricians navigating evolving building and electrical regulations․ The landscape is dynamic‚ with frequent amendments to BS 7671 and related legislation․ Relying solely on initial training is insufficient; proactive learning is essential․

Key resources include the IET (Institution of Engineering and Technology) website‚ offering updates‚ guidance‚ and training courses․ Regularly checking official Building Regulations websites for revisions is also crucial․ Subscribing to industry newsletters and participating in relevant webinars provides timely information․

Furthermore‚ engaging with professional bodies and networking with peers fosters knowledge sharing․ Remember‚ software like VirtualDJ‚ constantly updated for hardware compatibility‚ mirrors the need for electricians to adapt to regulatory changes․

Working with Building Control

Notifications must be submitted for Part P notifiable work‚ triggering Building Control inspections to ensure compliance with safety standards and regulations․

Submitting Notifications

Electricians undertaking Part P notifiable work must notify the Building Control body before commencing the installation․ This can be done directly to the local authority’s building control department‚ or through a Competent Person Scheme operator․

Using a scheme operator simplifies the process; they handle notification and often arrange inspection․ Notifications typically require detailed electrical installation plans‚ circuit diagrams‚ and confirmation of compliance with BS 7671․

Accurate documentation is vital․ Building Control may request additional information‚ so prompt responses are essential․ Failure to notify can result in penalties‚ including fines and required remedial work․ Keep records of all notifications and associated documentation for future reference․

Building Control Inspections

Building Control inspections are a crucial part of ensuring Part P compliance․ Following notification‚ a building control officer may visit the site to inspect the electrical work during and after installation․

Inspections focus on verifying adherence to BS 7671‚ safe installation practices‚ and correct earthing and bonding․ The officer will likely request sight of the Electrical Installation Certificate and test results․

Be prepared to demonstrate understanding of the installation and answer questions․ Any identified deficiencies must be rectified promptly․ A satisfactory inspection results in a completion certificate‚ confirming compliance with building regulations․ Cooperation and clear communication are key to a smooth inspection process․

Penalties for Non-Compliance

Non-compliance with building regulations can result in fines and legal repercussions․ Unsafe installations pose significant risks‚ leading to prosecution and potential imprisonment․

Fines and Legal Repercussions

Electrical safety breaches carry substantial penalties․ Fines can range significantly‚ depending on the severity of the non-compliance and potential risk posed․ For minor infractions‚ fines might begin in the hundreds of pounds‚ but serious violations – particularly those leading to injury or death – can result in tens of thousands of pounds in penalties․

Beyond financial repercussions‚ legal action can be taken․ This may involve prosecution under the Electricity at Work Regulations 1989 or related legislation․ Individuals responsible‚ including electricians and building owners‚ could face imprisonment in severe cases․ Furthermore‚ non-compliant installations can invalidate insurance policies‚ leaving parties financially vulnerable․ Maintaining compliance isn’t merely about avoiding penalties; it’s about safeguarding lives and property․

Resources for Electricians

Electricians can find vital information at the IET Website for wiring regulations and the official Building Regulations Website for compliance guidance and updates․

IET Website

The IET (Institution of Engineering and Technology) Website is an invaluable resource for electricians navigating building regulations and electrical safety standards․ It provides access to the latest editions of BS 7671‚ the IET Wiring Regulations‚ which are fundamental to safe and compliant electrical installations․

Beyond the core regulations‚ the IET offers a wealth of guidance notes‚ technical articles‚ and best practice documents covering various aspects of electrical work․ Members benefit from exclusive content‚ including webinars‚ training courses‚ and technical helplines․ The website also features tools for staying updated on amendments and changes to regulations‚ ensuring electricians remain compliant with the latest standards․ It’s a central hub for professional development and maintaining competence in the electrical industry․

Building Regulations Website

The official Building Regulations Website serves as the primary source for understanding the legal requirements governing electrical installations in buildings‚ particularly concerning Part P․ It details the scope of regulations‚ differentiating between work in dwellings and commercial/industrial properties․

Electricians can access approved documents outlining the standards for safety‚ performance‚ and energy efficiency․ The website provides information on notifiable electrical work requiring Building Control approval and clarifies what constitutes non-notifiable work․ Crucially‚ it details the process for submitting notifications and understanding inspection procedures․ Staying informed through this resource is vital for ensuring all electrical work adheres to legal standards and avoids potential penalties․

literary analysis essay example pdf

Literary analysis essays delve into the intricacies of texts, offering interpretations supported by evidence.

Exploring examples – often found in PDF format – provides valuable insight into effective analysis techniques.

Understanding structure, thesis development, and textual support are crucial for crafting compelling arguments.

What is a Literary Analysis Essay?

A literary analysis essay is a focused examination of a work of literature, going beyond simple summarization to explore its deeper meanings and artistic merit. It’s an argumentative paper where you present a thesis – a central claim about the text – and support it with evidence drawn directly from the literary work itself.

Example essays, frequently available as PDF downloads, demonstrate how to dissect a poem, story, or play. These examples showcase close reading skills, identifying literary devices, and constructing a coherent argument. They aren’t meant to be copied, but rather to serve as models for structure, style, and analytical depth. Studying these PDF resources helps understand how to formulate a strong thesis and effectively integrate textual evidence to support your interpretations.

The Purpose of Analyzing Literature

Analyzing literature isn’t merely about identifying themes; it’s about understanding how those themes are conveyed and why the author made specific choices. It cultivates critical thinking, enhances reading comprehension, and fosters a deeper appreciation for the art of storytelling.

Literary analysis essay examples, often found in PDF format, illustrate this process. They demonstrate how to unpack complex ideas, explore authorial intent, and connect the text to broader cultural or historical contexts. Examining these PDF resources reveals how scholars build arguments based on textual evidence. By studying these examples, you learn to move beyond personal opinions and develop well-supported, insightful interpretations of literary works, ultimately enriching your understanding of both the text and yourself.

Understanding the Core Components

A strong literary analysis essay centers around a clear, arguable thesis statement – the central claim you’ll prove. Supporting this thesis requires robust textual evidence: direct quotes and specific details from the work itself. Analyzing literary devices – symbolism, metaphor, point of view – reveals how the author achieves their effects.

Literary analysis essay examples, frequently available as PDF downloads, showcase these components in action. These PDF resources demonstrate effective thesis construction, skillful quote integration, and insightful device analysis. Studying these examples helps you recognize how a cohesive argument is built, paragraph by paragraph. Understanding these core elements, as illustrated in example essays, is fundamental to crafting a successful and compelling analysis.

Finding Literary Analysis Essay Examples (PDF)

Numerous online resources offer literary analysis essay examples in PDF format, aiding comprehension of structure and argumentation techniques.

Where to Download PDF Examples

Locating quality literary analysis essay examples in PDF format is readily achievable through various online platforms. Websites like Fountainheadpress.com provide downloadable samples, showcasing diverse analytical approaches. University writing centers often host collections of student essays, available for review and learning.

Educational databases and online repositories frequently contain academic papers, including literary analyses, often accessible as PDFs. A simple Google search using keywords like “literary analysis essay example PDF” yields numerous results. Remember to critically evaluate the source and the essay’s quality before utilizing it as a model. Exploring these resources will equip you with valuable insights into effective essay construction and analytical techniques.

Benefits of Using Example Essays

Utilizing literary analysis essay examples, particularly in PDF format, offers significant advantages to students. These examples demonstrate effective thesis statement construction and the skillful integration of textual evidence. They illustrate how to dissect complex literary devices, like symbolism and metaphor, and articulate insightful interpretations.

Examining well-crafted essays provides a practical understanding of essay structure – introductions, body paragraphs, and conclusions. Students can learn proper MLA formatting and citation techniques. Furthermore, analyzing diverse examples broadens analytical perspectives and inspires creative approaches to literary criticism, ultimately enhancing their own writing skills and comprehension.

Evaluating the Quality of Example Essays

When reviewing literary analysis essay examples in PDF format, critical evaluation is essential. Assess the clarity and strength of the thesis statement – does it offer a focused argument? Examine the quality of textual evidence; is it relevant and effectively analyzed?

Consider the essay’s structure: does it flow logically with well-developed paragraphs? Check for proper MLA formatting and accurate citations. A strong example will demonstrate insightful interpretation, not just summary. Beware of essays lacking depth or relying on unsupported claims. Prioritize examples that showcase sophisticated analysis and a clear understanding of literary concepts.

Key Elements of a Strong Literary Analysis Essay

Strong essays feature a focused thesis, supported by textual evidence, and insightful analysis of literary devices – as seen in PDF examples.

Developing a Strong Thesis Statement

A compelling thesis is the cornerstone of any successful literary analysis essay, and studying PDF examples illuminates this principle. It’s not merely a statement of fact, but an arguable claim about the text.

Effective thesis statements go beyond summarizing the plot; they present a unique interpretation, focusing on specific literary devices or themes. Examining sample essays reveals how authors concisely articulate their central argument.

Consider the essay’s scope – a strong thesis should be focused enough to be thoroughly explored within the essay’s length. PDF examples often demonstrate how a well-defined thesis guides the entire analysis, ensuring coherence and depth. A clear, debatable claim is paramount.

The Importance of Textual Evidence

Robust textual evidence is the bedrock of a convincing literary analysis, and PDF examples consistently showcase this. Assertions about a text must be substantiated with direct quotes and specific details.

Simply stating an interpretation isn’t enough; you must demonstrate how the text supports your claim. Analyzing example essays reveals effective strategies for integrating quotes seamlessly and explaining their significance.

Properly cited evidence lends credibility to your argument and demonstrates a close reading of the work. PDF resources often highlight the importance of context when presenting textual support, ensuring the quotes aren’t taken out of meaning. Evidence proves, interpretation explains.

Analyzing Literary Devices

Literary devices—symbolism, metaphor, simile, and point of view—are crucial elements for analysis, often exemplified in PDF essay examples.

Effective analysis doesn’t just identify these devices; it explains their function within the text and how they contribute to the overall meaning. Example essays demonstrate how to dissect complex imagery or unpack the significance of a narrative structure.

PDF resources frequently illustrate how a writer’s choice of device impacts the reader’s understanding. Examining these examples helps students move beyond surface-level observations to insightful interpretations, strengthening their analytical skills and arguments.

Symbolism and Imagery

Symbolism and imagery are potent literary devices, frequently showcased in detailed literary analysis essay examples available as PDF downloads.

Analyzing symbolism requires identifying objects, characters, or situations that represent abstract ideas. Imagery, appealing to the senses, creates vivid experiences for the reader. PDF examples often demonstrate how to trace recurring images and decipher their deeper meanings.

Strong essays don’t simply list symbols; they explain how these elements contribute to the text’s themes and overall message. Studying these examples provides a roadmap for interpreting complex literary works and crafting insightful arguments.

Metaphor and Simile

Metaphors and similes, figures of speech comparing unlike things, are central to literary analysis, and excellent examples are often found in literary analysis essay examples – frequently in PDF format.

Understanding the distinction – metaphors state a comparison (e.g., “life is a journey”), while similes use “like” or “as” (e.g., “brave as a lion”) – is crucial. PDF examples illustrate how these devices enhance meaning and create deeper understanding.

Effective analysis explores why an author chooses a specific comparison and its impact on the text’s themes. Examining these examples reveals how to dissect figurative language and articulate its significance.

Point of View and Narrative Structure

Point of view (POV) – first, second, or third person – profoundly shapes a narrative, and analyzing it is key in literary essays; many literary analysis essay examples, often available as PDF downloads, demonstrate this.

Narrative structure, encompassing elements like chronological order, flashbacks, and framing devices, also impacts meaning. PDF examples showcase how to identify these structures and interpret their effects.

Effective analysis considers how POV and structure influence the reader’s understanding of characters, themes, and the overall message. Studying well-crafted examples clarifies how to articulate these connections persuasively.

Structuring Your Literary Analysis Essay

Effective essays utilize clear introductions, well-developed body paragraphs, and strong conclusions; PDF examples illustrate these structures.

Organization is paramount for presenting a cohesive argument, as shown in many literary analysis essay examples.

Crafting a compelling introduction is vital for engaging your reader from the outset. Many literary analysis essay examples, often available as PDF downloads, demonstrate effective techniques.

Consider beginning with a captivating “grabber” – a thought-provoking quotation, a relevant anecdote, or a startling statement. This immediately focuses attention on your subject.

Subsequently, orient the reader to the author, the specific work being analyzed, and its broader context. Briefly outline the core argument you will be presenting.

A strong introduction smoothly transitions into your thesis statement, clearly articulating your interpretation of the literary work. PDF examples often highlight how successful introductions establish both interest and direction, setting the stage for a detailed analysis.

Remember, the introduction should provide a roadmap for your essay, guiding the reader through your analytical journey;

Body Paragraph Development

Effective body paragraphs form the core of a strong literary analysis essay. Examining PDF examples reveals consistent patterns of successful development.

Each paragraph should focus on a single, specific aspect of your argument, directly supporting your thesis statement. Begin with a clear topic sentence introducing the paragraph’s main point.

Crucially, integrate textual evidence – direct quotes or paraphrases – to substantiate your claims. Analyze this evidence meticulously, explaining how it supports your interpretation.

PDF samples demonstrate the importance of connecting evidence back to the overarching thesis, ensuring coherence. Avoid simply dropping quotes; instead, weave them seamlessly into your analysis.

Strong paragraphs conclude with a transitional sentence, smoothly leading into the next point, maintaining a logical flow throughout the essay.

Crafting a Compelling Conclusion

A strong conclusion doesn’t merely summarize; it synthesizes your literary analysis, leaving a lasting impression. Studying PDF examples highlights effective concluding strategies.

Restate your thesis, but avoid verbatim repetition. Rephrase it in light of the evidence presented throughout the essay, demonstrating a deepened understanding.

Expand upon the significance of your analysis. Why does your interpretation matter? What broader implications does it have for understanding the text or its themes?

PDF samples often showcase a concluding thought that connects back to the introduction, creating a sense of closure. Avoid introducing new evidence or arguments here.

End with a memorable statement – a final insight or a thought-provoking question – that resonates with the reader, solidifying your argument’s impact.

Specific Literary Analysis Essay Examples

Diverse examples – in formats like PDF – illustrate analysis of poetry, fiction, and drama.

Studying these samples reveals varied approaches to thesis construction and textual interpretation.

PDF resources offer models for structuring arguments and supporting claims with evidence.

Poetry Analysis Essay Example

Analyzing poetry requires close attention to language, form, and figurative devices. PDF examples demonstrate how to dissect a poem’s structure – rhyme scheme, meter, and stanza arrangement – to reveal deeper meaning.

Effective essays identify key themes and explore how poetic elements contribute to their development. Students can learn from sample essays how to articulate a clear thesis statement focused on a specific interpretation.

Consider how imagery, symbolism, and sound devices (alliteration, assonance) enhance the poem’s impact. PDF resources often showcase strong textual evidence, properly cited, to support analytical claims. Examining these examples helps understand how to build a cohesive argument, moving beyond simple paraphrase to insightful commentary.

Look for essays that demonstrate a nuanced understanding of the poet’s craft and the poem’s historical or cultural context.

Fiction Analysis Essay Example

Analyzing fiction – novels and short stories – demands attention to plot, character, setting, and theme. PDF examples illustrate how to dissect narrative techniques and their effects on the reader. A strong essay will move beyond plot summary, focusing instead on how the story is told.

Effective analyses explore character motivations, relationships, and development, supported by textual evidence. PDF resources demonstrate how to identify and interpret literary devices like foreshadowing, irony, and symbolism within the narrative.

Students can learn from sample essays how to formulate a focused thesis statement and build arguments based on close reading. Consider the author’s style, point of view, and the story’s broader context. Examining these examples reveals how to craft a compelling and insightful interpretation.

Drama Analysis Essay Example

Analyzing drama – plays – requires considering dialogue, stage directions, and character interactions. PDF examples showcase how to interpret a play’s themes, conflicts, and dramatic structure. Unlike fiction or poetry, drama is intended for performance, influencing interpretation.

Effective essays examine how playwrights use language, symbolism, and staging to convey meaning. PDF resources demonstrate analyzing character arcs, motivations, and relationships within the context of the play’s setting and historical period.

Students can learn from sample essays how to develop a thesis focusing on a specific aspect of the play, supported by textual evidence from the script. Consider the play’s intended audience and its potential impact. These examples reveal insightful analytical approaches.

MLA Formatting and Citation

Proper MLA style, detailed in PDF guides, ensures academic integrity. In-text citations and a Works Cited page are essential for acknowledging sources.

In-Text Citations

In-text citations are vital when referencing textual evidence within your literary analysis essay, mirroring examples often found in PDF guides.

Typically, these consist of the author’s last name and page number in parentheses – (Austen 25) – directly following the quoted or paraphrased material.

If the author is mentioned in the sentence, only the page number is needed: “As Austen notes,…” (25).

For works without page numbers, like some online sources, use a shortened version of the title or a paragraph number if available.

Consistency is key; adhere strictly to MLA guidelines as demonstrated in sample essays available as PDF downloads, ensuring accurate attribution and avoiding plagiarism.

Referencing correctly strengthens your argument and demonstrates scholarly rigor.

Works Cited Page

The Works Cited page, essential in any literary analysis essay – and often detailed in PDF examples – lists all sources referenced.

Entries are alphabetized by the author’s last name, with hanging indents for readability.

MLA format dictates specific structures for books, articles, and online sources; consult style guides or PDF templates for accuracy.

Include all necessary information: author, title, publication date, publisher, and URL (if applicable).

Pay close attention to punctuation and capitalization, as errors can detract from your credibility.

A correctly formatted Works Cited page demonstrates academic integrity and allows readers to verify your sources, mirroring the standards shown in exemplary PDF essays.

Peer Editing and Revision

Peer review, aided by score sheets, refines essays; comparing to PDF examples highlights strengths and weaknesses.

Revision strengthens arguments and clarifies analysis, improving overall essay quality.

Using a Score Sheet for Feedback

Employing a score sheet during peer editing provides structured feedback, ensuring comprehensive evaluation of literary analysis essays.

Key areas for assessment include thesis clarity, textual evidence integration, and the insightful analysis of literary devices – mirroring qualities seen in strong PDF examples.

The score sheet should address argument development, organization, and adherence to MLA formatting guidelines.

Specific criteria might assess the effectiveness of the introduction, the logical flow of body paragraphs, and the strength of the conclusion.

Comparing the essay to exemplary PDF models helps identify areas needing improvement, focusing on elements like nuanced interpretation and persuasive writing.

Detailed feedback, guided by the score sheet, empowers writers to refine their work and elevate their analytical skills.

Common Mistakes to Avoid

When crafting literary analyses, several pitfalls hinder clarity and impact. Avoid simply summarizing plots; focus on interpreting meaning, as demonstrated in effective PDF examples.

Insufficient textual evidence weakens arguments – always support claims with direct quotes and detailed analysis.

Vague language and generalizations diminish credibility; strive for precision and specificity.

Ignoring literary devices overlooks crucial elements of the text; explore symbolism, metaphor, and narrative structure.

Poor organization disrupts the flow of ideas; ensure logical paragraphing and transitions.

Failing to proofread introduces errors that detract from the essay’s professionalism; compare your work to polished PDF samples.

Advanced Techniques in Literary Analysis

Deepen analysis by exploring historical context and literary theory, enriching interpretations beyond the text itself.

Analogies, seen in strong PDF examples, can illuminate complex themes and connections.

Considering Historical and Cultural Context

Understanding the era in which a literary work was created is paramount to insightful analysis. Examining the historical and cultural backdrop reveals nuances often missed through a purely textual reading.

PDF examples of strong literary analyses frequently demonstrate this approach, showcasing how societal norms, political climates, and prevailing ideologies shaped the author’s perspective and the work’s themes.

Consider the author’s biography and the intended audience. What were the dominant beliefs of the time? How might these factors have influenced the narrative, characters, or symbolism?

Contextualizing the work doesn’t mean imposing modern values, but rather appreciating the original meaning within its specific time and place, enriching your essay’s depth.

Utilizing Literary Theory

Employing literary theory provides frameworks for interpreting texts beyond surface-level understanding. Theories like feminism, Marxism, or post-structuralism offer lenses through which to analyze a work’s underlying assumptions and power dynamics.

PDF examples of advanced literary analyses often demonstrate the application of these theories, showcasing how they illuminate hidden meanings and complexities.

Choosing a relevant theory depends on the text and your analytical focus. For instance, a feminist reading might explore gender roles, while a Marxist analysis could examine class struggles.

Clearly articulate your theoretical framework and how it informs your interpretation, strengthening your argument and demonstrating critical thinking.

The Role of Analogies in Analysis

Analogies serve as powerful tools in literary analysis, bridging complex concepts to more accessible understandings. They allow you to draw parallels between the text and other works, historical events, or even everyday experiences, enriching your interpretation.

Examining PDF examples of strong essays reveals how skilled analysts use analogies to clarify abstract ideas and demonstrate nuanced insights.

Effective analogies aren’t merely decorative; they must directly support your thesis and illuminate the text’s meaning. Avoid strained or superficial comparisons.

Thoughtfully constructed analogies can elevate your analysis, showcasing your ability to think critically and connect seemingly disparate elements.

network architect’s handbook pdf

This handbook provides a comprehensive guide to network architecture, blending technical expertise with real-world insights to help aspiring architects master design, performance, and career advancement strategies effectively.

1.1 Overview of the Handbook’s Purpose and Scope

The Network Architect’s Handbook serves as a detailed guide for professionals aiming to excel in network architecture. Its purpose is to provide a structured approach to understanding the role, responsibilities, and required skills of a network architect. The scope encompasses technical expertise, practical examples, and career development strategies, ensuring a holistic understanding of the field. It covers essential topics such as network design, performance optimization, and configuration management, while also addressing soft skills like collaboration and stakeholder management. The handbook is designed to bridge the gap between theoretical knowledge and real-world application, making it an invaluable resource for both aspiring and experienced network architects.

1.2 Importance of the Handbook for Aspiring Network Architects

The Network Architect’s Handbook is a vital resource for aspiring network architects, offering a clear roadmap to developing essential competencies. It provides insights into the technical and soft skills required, along with practical advice and real-life examples. The handbook emphasizes the importance of understanding IT infrastructure, overcoming network challenges, and aligning architecture with organizational goals. By following the guidance, readers can enhance their engineering skills, improve collaboration with stakeholders, and effectively manage vendors. Additionally, the handbook covers certifications and interview preparation, making it an indispensable tool for career advancement in this demanding and rewarding field.

Understanding the Role of a Network Architect

This section explores the network architect’s role, blending technical expertise in designing robust networks with collaboration and strategic alignment to meet organizational objectives.

2.1 Key Responsibilities and Skills Required

Network architects are responsible for designing and optimizing network infrastructures, ensuring scalability, security, and performance. They must possess deep technical expertise in networking fundamentals, including protocols, architectures, and hardware. Hands-on experience with network design tools and technologies is essential. Additionally, architects need strong analytical skills to troubleshoot and resolve complex network issues. Collaboration with cross-functional teams, such as IT and stakeholders, is critical for aligning network solutions with organizational goals. Effective communication and project management skills are also vital to deliver projects on time and within budget. Proficiency in emerging technologies like cloud networking and automation further enhances their ability to adapt to evolving IT landscapes.

2.2 The Evolution of the Network Architect Role in Modern IT

The role of network architects has evolved significantly, expanding from traditional network design to encompass cloud integration, security, and automation. With the rise of digital transformation, architects now must design scalable, secure, and high-performing networks that align with organizational goals. The shift to hybrid and multi-cloud environments has introduced new challenges, requiring architects to master cloud-based solutions and DevOps practices. Additionally, the increasing importance of cybersecurity has made it essential for architects to integrate robust security measures into network designs. As technology advances, the role continues to adapt, demanding continuous learning and adaptation to emerging trends like AI-driven networking and software-defined architectures.

Essential Skills for Network Architects

Mastering technical expertise, soft skills, and business acumen is crucial for network architects to design scalable, secure, and high-performing networks that align with organizational objectives effectively.

3.1 Technical Skills: Networking Fundamentals and Advanced Concepts

Network architects must possess deep expertise in networking fundamentals, including routing, switching, and network design. Advanced concepts like SDN, automation, and cloud networking are also critical. These skills enable architects to design scalable, secure, and high-performing networks. Understanding protocols, traffic management, and optimization techniques is essential for ensuring reliable connectivity and meeting organizational demands. The handbook provides detailed insights into these technical areas, offering practical guidance on implementing modern networking technologies effectively. By mastering these skills, architects can create robust infrastructures that support business growth and adapt to evolving IT landscapes.

3.2 Soft Skills: Collaboration and Stakeholder Management

Effective collaboration and stakeholder management are crucial for network architects, as they often work with cross-functional teams and C-Suite executives. Strong communication skills are essential to translate technical concepts into business outcomes. Architects must also navigate vendor and service provider relationships, ensuring alignment with organizational goals. The handbook emphasizes the importance of negotiation, emotional intelligence, and conflict resolution to maintain harmony among stakeholders. By fostering collaboration, architects can drive consensus and deliver solutions that meet both technical and business requirements. These soft skills are equally vital as technical expertise in achieving success in network architecture roles.

3.3 Business Acumen: Aligning Network Architecture with Organizational Goals

Network architects must align their technical expertise with organizational objectives, requiring strong business acumen. This involves understanding the company’s strategic goals and translating them into network designs that drive efficiency and innovation. The handbook highlights the importance of cost management, resource optimization, and scalability in architecture planning. Architects need to balance technical requirements with budget constraints, ensuring investments in network infrastructure support long-term business growth. By integrating business insights with technical knowledge, they can create architectures that not only meet current needs but also adapt to future demands, making them invaluable assets to their organizations.

Grasping the Big Picture of IT Infrastructure

Grasping the big picture of IT infrastructure is crucial for network architects, as it enables them to design networks that align with organizational goals and support business operations and innovation effectively.

4.1 Understanding the Interconnected Components of IT Systems

Understanding the interconnected components of IT systems is vital for network architects, as it ensures seamless integration and optimal performance. This involves grasping how hardware, software, networking, and storage work together to support business operations. By recognizing these interdependencies, architects can design networks that enhance scalability, reliability, and security. The handbook emphasizes the importance of this holistic understanding, providing insights into how each component influences overall IT infrastructure. Practical advice and real-world examples help architects align network design with organizational objectives, ensuring that systems function cohesively to meet current and future demands. This knowledge is essential for creating robust and adaptable network architectures.

4.2 The Impact of Network Architecture on Overall IT Infrastructure

Network architecture plays a pivotal role in shaping the efficiency, scalability, and security of an organization’s IT infrastructure. A well-designed network architecture ensures seamless communication between systems, optimizing performance and supporting business operations. Conversely, poor architecture can lead to bottlenecks, security vulnerabilities, and inefficiencies. The handbook highlights how network design directly influences IT infrastructure, emphasizing the need for alignment with organizational goals. By understanding these dynamics, network architects can create robust, adaptable systems that drive innovation and resilience. Practical advice and real-world examples from the handbook empower architects to make informed decisions, ensuring their designs positively impact overall IT infrastructure and organizational success.

Overcoming Challenges in Network Performance

Identify bottlenecks, optimize configurations, and implement expert strategies to enhance network efficiency, ensuring robust performance and reliability in IT infrastructure, as detailed in the handbook.

5.1 Identifying and Addressing Bottlenecks in Network Design

Network architects must proactively identify bottlenecks through thorough monitoring and analysis of traffic patterns and system performance. Addressing these issues involves optimizing configurations, upgrading hardware, or scaling infrastructure to ensure seamless connectivity. The handbook provides expert strategies to pinpoint bottlenecks, such as leveraging diagnostic tools and conducting stress tests. By understanding the root causes of inefficiencies, architects can implement targeted solutions to enhance network reliability and speed. Additionally, the guide emphasizes the importance of proactive planning to anticipate and mitigate potential bottlenecks before they impact performance. This section offers practical advice to help architects design robust networks capable of handling growing demands effectively.

5.2 Best Practices for Configuration Management

Effective configuration management is crucial for maintaining network stability and performance. The handbook outlines best practices, such as implementing version control systems to track changes and using automation tools like Ansible or Puppet for consistent deployments. Regular backups of configurations ensure quick recovery in case of failures. Additionally, centralized management platforms can streamline updates and reduce human error. Documenting all changes and maintaining detailed records is essential for accountability and troubleshooting. By adhering to these practices, network architects can minimize downtime, ensure compliance, and maintain scalability. The guide also emphasizes the importance of testing configurations in controlled environments before deploying them to production networks.

Career Advancement for Network Architects

The handbook offers certification guidance, interview tips, and insights into continuous learning, empowering architects to stay competitive and advance their careers in the evolving IT landscape.

6.1 Certification Guidance: Key Certifications for Network Architects

Obtaining the right certifications is crucial for network architects to validate their expertise. The handbook highlights key certifications such as Cisco’s CCNA, CCNP, and CCIE, which are highly regarded in the industry. It also covers certifications from other vendors like Juniper and AWS, emphasizing their relevance in modern networking environments. These certifications not only demonstrate technical proficiency but also enhance career prospects. The guide provides detailed insights into exam preparation, study materials, and practical tips to help aspiring architects achieve these credentials. By aligning with industry standards, these certifications ensure network architects stay competitive and adaptable in a rapidly evolving IT landscape.

6.2 Preparing for Network Architect Interviews: Common Questions and Tips

Preparing for network architect interviews requires a strategic approach. The handbook outlines common questions, such as designing scalable networks, troubleshooting complex issues, and explaining networking fundamentals. It also provides tips like researching the company’s infrastructure and practicing with mock interviews. Emphasizing problem-solving skills and real-world examples is crucial. The guide advises candidates to demonstrate a deep understanding of network architecture principles and their practical applications. Additionally, it highlights the importance of soft skills, such as communication and collaboration, to showcase leadership abilities. By focusing on these areas, aspiring architects can confidently navigate the interview process and stand out as qualified professionals.

Real-Life Examples and Practical Advice

The handbook offers real-life examples and expert tips, providing practical insights into handling daily challenges and implementing successful network architectures, aiding in understanding and applying key concepts effectively.

7.1 Case Studies: Successful Network Architecture Implementations

The handbook includes detailed case studies showcasing successful network architecture implementations, such as optimizing data center performance and deploying SD-WAN solutions. These real-world examples highlight how network architects addressed challenges like latency, scalability, and security. By analyzing these scenarios, readers gain practical insights into designing robust, efficient, and future-proof networks. The case studies also demonstrate how aligning network architecture with organizational goals can drive business success. These examples serve as valuable learning tools, enabling aspiring architects to apply proven strategies in their own environments and overcome common obstacles effectively.

7.2 Expert Tips for Handling Daily Challenges in Network Architecture

The handbook offers expert tips for tackling daily challenges, such as adopting a proactive approach to network monitoring and leveraging automation tools to streamline tasks. It emphasizes the importance of continuous learning to stay ahead of emerging technologies and security threats. Readers learn how to effectively communicate technical concepts to non-technical stakeholders, ensuring alignment with business goals. Practical advice includes implementing robust documentation practices and conducting regular network audits to identify and resolve issues before they escalate. These tips empower network architects to manage complexities, optimize performance, and maintain resilience in dynamic IT environments, ensuring long-term success and adaptability in their roles.

The Importance of the Network Architect’s Handbook

This handbook serves as a comprehensive guide, offering practical advice, certification insights, and real-world examples to support continuous learning and professional growth for network architects.

8.1 Why This Handbook Stands Out as a Comprehensive Guide

The Network Architect’s Handbook distinguishes itself by offering a holistic approach to network architecture, combining technical expertise with practical insights. It provides a step-by-step roadmap for developing essential skills, from design to configuration management. Unlike other resources, it integrates real-life case studies and expert tips, making it invaluable for both beginners and seasoned professionals. The handbook’s emphasis on aligning network architecture with organizational goals ensures its relevance in dynamic IT environments. Additionally, its coverage of certifications and interview preparation sets it apart as a complete career advancement tool, making it an indispensable resource for aspiring and practicing network architects alike.

8.2 How the Handbook Supports Continuous Learning and Professional Growth

The Network Architect’s Handbook is designed to foster continuous learning and professional growth through its structured approach. It offers in-depth insights into emerging trends and technologies, ensuring readers stay updated with industry advancements. The inclusion of real-life examples and practical advice enables professionals to apply theoretical knowledge in real-world scenarios. Furthermore, the handbook’s focus on certifications and interview preparation equips network architects with the tools needed to advance their careers. By bridging the gap between technical skills and business acumen, it empowers professionals to adapt to evolving IT landscapes, making it an essential resource for lifelong learning and career development in network architecture.

The Future of Network Architecture

The future of network architecture lies in emerging technologies and innovative designs. This handbook guides professionals in navigating these advancements, ensuring they remain at the forefront of IT evolution.

9.1 Emerging Trends and Technologies in Networking

Emerging trends like Software-Defined Networking (SDN), Network Functions Virtualization (NFV), and the integration of AI/ML are reshaping network architecture. These technologies enable greater flexibility, scalability, and automation, optimizing performance and security. The rise of edge computing and 5G networks is also transforming how data is processed and transmitted, reducing latency and enhancing real-time applications. Additionally, advancements in network automation tools are streamlining configuration management and reducing human error. The Network Architects Handbook delves into these cutting-edge technologies, providing insights and practical guidance for architects to stay ahead in this rapidly evolving field and effectively design future-proof networks.

9.2 The Role of Network Architects in Shaping the Future of IT

Network architects play a pivotal role in shaping the future of IT by designing and implementing scalable, secure, and efficient network infrastructures. As technology advances, architects must align network strategies with organizational goals, leveraging emerging trends like AI, SDN, and edge computing. They are responsible for driving innovation, ensuring seamless integration of new technologies, and fostering collaboration between IT teams and stakeholders. By staying ahead of industry trends and continuously developing their skills, network architects are instrumental in positioning organizations for long-term success in an increasingly connected and data-driven world. Their expertise ensures that IT infrastructure remains adaptable and resilient to future challenges.

Conclusion

The Network Architect’s Handbook serves as a vital resource for professional growth, offering insights and practical advice to help architects excel in their roles and shape IT’s future effectively.

10.1 Summarizing the Key Takeaways from the Handbook

The Network Architect’s Handbook provides a comprehensive roadmap for mastering network architecture, emphasizing the importance of technical skills, collaboration, and business alignment. It highlights the need to grasp IT infrastructure’s interconnected components and address performance challenges through best practices. The guide underscores the value of certifications, interview preparation, and continuous learning for career advancement. Real-life examples and expert tips offer practical insights into overcoming daily challenges. By aligning network design with organizational goals, architects can drive innovation and efficiency. This handbook equips aspiring professionals with the tools to excel, ensuring they remain relevant in a rapidly evolving IT landscape.

10.2 Encouragement to Pursue a Career in Network Architecture

Pursuing a career in network architecture offers immense opportunities for innovation, problem-solving, and professional growth. As technology evolves, the demand for skilled architects who can design and optimize network infrastructures continues to rise. This handbook serves as a powerful resource, equipping you with the knowledge and skills needed to excel in this dynamic field. By mastering networking fundamentals, embracing emerging trends, and leveraging real-world insights, you can position yourself as a vital asset to any organization. The journey may be challenging, but the rewards—both personal and professional—are significant. Let this handbook inspire and guide you toward a fulfilling and impactful career in network architecture.

eyelash mapping guide

Eyelash mapping is a personalized technique used to enhance natural beauty by creating a guide for applying eyelash extensions, ensuring balanced and symmetrical results for various eye shapes.

What is Eyelash Mapping?

Eyelash mapping is a precise technique used to create a personalized guide for applying eyelash extensions. It involves assessing the natural growth pattern of your lashes and eye shape to determine the best placement of extensions. This method ensures symmetry and a natural look by dividing the lash line into sections, with varying lengths and volumes of lashes applied accordingly. By mimicking the natural growth of lashes, which are typically shorter at the inner corners and longer toward the outer edges, lash mapping enhances the eyes’ appearance while maintaining a seamless blend with your real lashes. This approach is tailored to individual features, making it a cornerstone of professional lash application.

Importance of Eyelash Mapping

Eyelash mapping is essential for achieving a balanced and visually appealing lash application. It ensures symmetry between the eyes and prevents overloading the natural lashes, which can cause damage. By creating a personalized guide, lash mapping allows technicians to tailor the application to the client’s eye shape, natural lash growth, and desired aesthetic. This technique enhances the natural beauty of the eyes while maintaining a seamless look. Proper mapping also prevents unevenness and ensures the lashes look fuller and more defined. It is a crucial step in professional lash applications, as it guarantees long-lasting, comfortable, and flattering results that complement individual features.

Benefits of Eyelash Mapping

Eyelash mapping enhances natural beauty, prevents lash damage, and offers a customized look. It boosts confidence by creating balanced, symmetrical results tailored to individual eye shapes and preferences.

Enhancing Natural Beauty

Eyelash mapping is a technique that mimics the natural growth pattern of lashes, creating a seamless and balanced look. By strategically placing extensions, it enhances the eyes’ natural shape and size. This method ensures lashes appear fuller and longer without looking artificial. The process starts with shorter lashes at the inner corners, gradually increasing in length toward the outer edges, which elongates the eyes. Customization based on eye shape and desired aesthetics allows for a personalized approach. Whether aiming for a subtle, natural appearance or a dramatic effect, lash mapping ensures a harmonious blend with one’s features. This technique boosts confidence by framing the face beautifully and enhancing overall beauty effortlessly.

Preventing Lash Damage

Eyelash mapping plays a crucial role in preventing lash damage by ensuring extensions are applied safely and evenly. A well-designed map avoids overloading natural lashes, minimizing the risk of breakage or shedding. By following the natural growth pattern, the technique distributes weight evenly, reducing strain on individual lashes; Proper application techniques, such as avoiding clusters at the inner corners, help protect delicate lashes. Using high-quality products and tools further enhances safety. This personalized approach promotes healthy lash growth while achieving desired aesthetics. Regular maintenance and aftercare also contribute to long-term lash health. Lash mapping is not just about beauty—it’s a protective measure to preserve your natural lashes for years to come.

Step-by-Step Guide to Creating an Eyelash Map

Creating an eyelash map involves assessing eye shape and natural lash growth, preparing the lash area, and carefully applying extensions to achieve a balanced, symmetrical look.

Assessing Eye Shape and Natural Lash Growth

Assessing eye shape and natural lash growth is crucial for creating a personalized lash map. Different eye shapes, such as almond, round, or hooded, require tailored approaches to ensure symmetry. Natural lash growth patterns, including length and density, are evaluated to determine the best placement of extensions. This step ensures the lashes complement the client’s features, enhancing their natural beauty while maintaining a balanced look. Proper assessment prevents uneven application and damage to natural lashes, making it a foundational step in the lash mapping process.

Preparing the Lash Area

Preparing the lash area is essential for a successful lash mapping process. Start by cleaning the lash line with an oil-free cleanser to remove dirt, oil, or makeup residue, ensuring a clean surface for extension application. Next, apply under-eye pads or medical tape to separate the lower lashes from the upper ones, preventing any accidental adhesion. Gently prime the natural lashes with a lash primer to enhance bonding and promote long-lasting results. Proper preparation ensures a smooth application, minimizes the risk of damage, and allows the lash map to be accurately followed. A well-prepared lash area is the foundation for achieving the desired look and maintaining the health of natural lashes.

Applying the Lash Map

Applying the lash map involves carefully placing eyelash extensions according to the pre-determined pattern. Start by identifying the natural lash growth pattern and aligning the extensions with it. Using tweezers, gently pick up a small cluster of lashes and dip the band in a thin layer of adhesive. Place the cluster at the base of the natural lash, following the map’s guidance for length and volume distribution. Focus on the outer corner for a more dramatic effect, ensuring even spacing and symmetry. Avoid overloading the inner corners to maintain a natural appearance. Once applied, allow the adhesive to dry completely before finishing with a light coat of lash sealant to extend wear and protect the bonds.

Tools and Materials Needed

Essential tools include tweezers, adhesive, and under-eye pads. Materials needed are high-quality lash extensions and an oil-free cleanser for a clean application process.

Essential Products for Lash Mapping

To achieve professional results, essential products include high-quality eyelash extensions, a strong adhesive, and tweezers for precise application. An oil-free cleanser is necessary to clean the lash line, ensuring proper adhesion. Under-eye pads or medical tape help protect the lower lashes during the process. A lash brush is also useful for separating and arranging lashes evenly. Additionally, a lash mapping guide or stencil can aid in creating symmetry and balance. These tools and products work together to ensure a flawless and long-lasting application, catering to various eye shapes and desired looks. Investing in reputable brands and proper materials is key to achieving the best outcomes in lash mapping.

Recommended Brands and Tools

For lash mapping, professional-grade tools and products are essential. Recommended brands include VinLash, known for their high-quality eyelash extensions and adhesives. Tweezers from brands like Rubis Switzerland are ideal for precise application. Lash brushes and under-eye pads from The Lash Shop are also popular choices. Adhesives like Duo Eyelash Adhesive are highly regarded for their strength and durability. Additionally, lash mapping stencils or guides from brands like LashBase can help achieve symmetry. These tools and products are trusted by professionals for their reliability and performance, ensuring a flawless and long-lasting lash application. Investing in quality brands enhances both the process and the final result of lash mapping.

Customizing Your Lash Map

Customizing your lash map involves tailoring the design to your eye shape and desired aesthetic, ensuring a personalized look that enhances natural beauty while addressing individual preferences.

Based on Eye Shape

Customizing your lash map based on eye shape ensures a flattering and balanced look. For almond-shaped eyes, a natural cat-eye map enhances their elongated appearance. Round eyes benefit from longer lashes at the outer corners to create length. Hooded eyes require a subtle, natural map to avoid overwhelming the lid. For monolids, a soft, gradual lash application from inner to outer corners adds depth without heaviness. Each eye shape has unique needs, and tailoring the lash map accordingly ensures a harmonious, polished result that complements individual features. This personalized approach maximizes the beauty of your eyes while maintaining a natural, seamless appearance;

Based on Desired Look

Eyelash mapping can be tailored to achieve specific aesthetic goals, whether natural, dramatic, or voluminous. For a subtle, everyday look, lashes are shorter and more sparse, focusing on enhancing natural growth. A cat-eye effect is created by placing longer lashes toward the outer corners, adding drama and depth. Volume lovers often opt for thicker clusters and varying lengths to create a fuller appearance. The desired look dictates the placement, length, and density of lashes, ensuring the final result aligns with personal style. Customizing based on the desired look allows for versatility, making lash mapping a versatile tool for achieving any lash aesthetic, from understated to glamorous.

Maintaining Your Lash Map

Proper aftercare ensures longevity. Cleanse gently, avoid oil-based products, and schedule touch-ups. This maintains the lash map’s appearance and prevents damage, keeping lashes vibrant and intact longer.

Aftercare Tips

Proper aftercare is essential for maintaining your lash map. Gently cleanse the lashes daily with an oil-free cleanser to prevent buildup. Avoid using oil-based products, as they can weaken the adhesive. Refrain from rubbing your eyes or exposing your lashes to excessive water. Use a spoolie to brush your lashes in the morning and evening to keep them aligned and tangle-free. Schedule regular touch-ups to maintain the desired look and prevent gaps. Avoid mascara, as it can cause damage. By following these tips, you can extend the wear of your lash map and keep your lashes looking full and vibrant for longer.

Extending Wear

To extend the wear of your lash map, regular touch-ups are crucial. Schedule appointments every 2-3 weeks to refill gaps and maintain the desired fullness. Avoid using oil-based products, as they can weaken the adhesive and cause lashes to shed prematurely. Gently cleanse the lashes with an oil-free cleanser to remove dirt and oils. Refrain from excessive rubbing or touching, as this can dislodge the lashes. Using a lash brush daily helps keep the lashes aligned and prevents tangling. Proper aftercare and professional application are key to ensuring your lash map lasts longer and remains vibrant. By following these steps, you can enjoy your lashes for an extended period while maintaining their natural appearance.

Troubleshooting Common Issues

Common issues like uneven application or allergic reactions can arise. Cleaning the lash area thoroughly and adjusting the map can resolve unevenness. For allergies, switch to hypoallergenic products.

Addressing Uneven Application

Uneven application is a common issue in eyelash mapping, often due to improper alignment or inconsistent lash placement. To address this, start by cleaning the lash line with an oil-free cleanser to ensure a smooth base. Use under-eye pads or medical tape to separate lower lashes, preventing interference. Gently remove any misplaced lashes and reapply them according to your map. Ensure the lash strips or individual lashes align perfectly with the natural lash line. If unevenness persists, consider adjusting the lash map to better suit your eye shape. For severe cases, consulting a professional can help achieve a more balanced and polished look. Proper technique and patience are key to resolving uneven application effectively.

Managing Allergic Reactions

Allergic reactions to eyelash mapping products can occur, causing irritation, redness, or itching. If symptoms arise, immediately remove the lashes and cleanse the area with a gentle, oil-free cleanser. Apply a cold compress to reduce swelling and discontinue use of the product. Identify the allergen by reviewing the ingredients used, such as adhesives or lash materials. To prevent future reactions, perform a patch test 24-48 hours before application. Choose hypoallergenic products and consult a professional for guidance. For severe reactions, seek medical advice. Proper aftercare and product selection are crucial to avoiding allergic responses and ensuring a safe, enjoyable lash mapping experience.

Eyelash mapping enhances natural beauty and prevents damage. Choose styles suiting your eye shape for a flawless look. Regular maintenance ensures long-lasting, stunning results.

Eyelash mapping is a personalized technique to enhance natural beauty and prevent lash damage. It involves creating a guide for applying extensions, ensuring symmetry and balance. By assessing eye shape and lash growth, individuals can customize their look, from natural to dramatic. Proper preparation and application are key to achieving desired results. Regular maintenance and aftercare extend wear and maintain health. Whether for professionals or DIY enthusiasts, lash mapping offers a tailored approach to achieving stunning, long-lasting lashes. This method is versatile, catering to various eye shapes and personal preferences, making it a valuable tool in beauty routines.

Advanced Techniques for Professionals

For professionals, mastering advanced lash mapping techniques can elevate results. Layering lashes for a 3D effect and creating intricate designs require precision. Combining volume and classic lashes balances drama with natural beauty. Custom mapping for unique eye shapes, like hooded or almond eyes, ensures flattering outcomes. Advanced tools, such as precision tweezers and high-quality adhesives, enhance application. Professionals can also experiment with color variations and intricate patterns for personalized looks. Regular training and practice refine skills, allowing for faster, more precise applications. Staying updated on trends, like hybrid lashes or mega volume sets, keeps professionals ahead in the industry. These techniques ensure clients receive bespoke, high-quality lash enhancements tailored to their preferences and eye features.